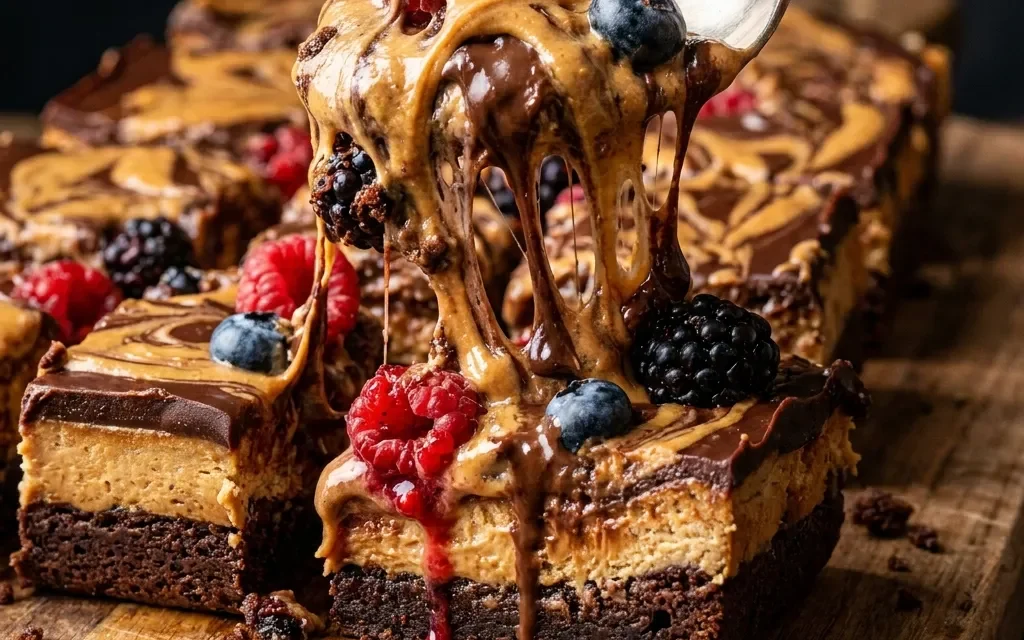
I’ll never forget the first time I made Chocolate Peanut Butter Cheesecake Bars. It was a rainy Saturday, the kind of day that calls for something sweet and decadent. I was scrolling through my favorite recipe blog when the image of those luscious bars caught my eye. The idea of rich chocolate combined with creamy peanut butter was irresistible. I could almost taste it just by looking at the picture!
So, I gathered my ingredients, excited to whip up this delightful treat. I remember crushing the chocolate sandwich cookies for the crust, my hands covered in fine crumbs. It was messy, but I loved every second of it. As I melted the butter and mixed it with the cookie crumbs, the aroma filled my kitchen, instantly lifting my spirits. I whipped the cream cheese and peanut butter together, and the mixture turned into this silky, dreamy concoction that promised pure indulgence.
When I finally pulled the bars out of the oven, the kitchen smelled heavenly. The chocolate drizzle on top was the finishing touch that made everything look so professional. I couldn’t wait to dig in! Sharing these Chocolate Peanut Butter Cheesecake Bars brought smiles all around, and I was met with rave reviews. Every bite was a perfect blend of rich, creamy, and slightly crunchy. Those bars became my go-to dessert for gatherings and special occasions, and I can confidently say they’re a hit every time.
Now, whenever I’m in need of a pick-me-up or looking to impress friends, I turn to these Chocolate Peanut Butter Cheesecake Bars. They’re a reminder that sometimes, the simplest ingredients can create the most delightful memories.
Why This Chocolate Peanut Butter Cheesecake Bars Recipe Will Become Your Go-To
The Secret Behind Perfect Chocolate Peanut Butter Cheesecake Bars
What makes this Chocolate Peanut Butter Cheesecake Bars recipe truly special is its perfect balance of flavors and textures. The combination of the crunchy chocolate sandwich cookie crust with the velvety peanut butter cheesecake filling creates an irresistible contrast that keeps you coming back for more. Each bite is a symphony of creamy peanut butter, rich chocolate, and a hint of sweetness, making it a delightful treat for any occasion.
Moreover, the simplicity of this recipe adds to its charm. With just a handful of ingredients, you can whip up a dessert that looks and tastes like it came from a gourmet bakery. The layers come together effortlessly, and you don’t need any fancy equipment—just a mixing bowl and a baking dish will do. This ease of preparation makes it perfect for both novice bakers and seasoned pros, ensuring that everyone can enjoy these delectable bars without a hitch.
Essential Ingredients You’ll Need
To create these Chocolate Peanut Butter Cheesecake Bars, you’ll need a few simple yet essential ingredients that come together to create that rich, creamy goodness.
1 ½ cups chocolate sandwich cookies, crushed
The base of our dessert, these cookies not only provide a delightful crunch but also infuse a robust chocolate flavor that pairs beautifully with the filling. Using finely crushed cookies ensures that the crust holds together perfectly.
½ cup unsalted butter, melted
Butter acts as the binding agent for the crust, giving it a rich flavor and a moist texture. Unsalted butter is recommended to control the overall saltiness of the dessert.
16 oz cream cheese, softened
Cream cheese is the star of the filling, lending a smooth and creamy texture. Make sure it’s softened for easy blending, which helps achieve that luxurious mouthfeel we all love.
1 cup creamy peanut butter
Peanut butter adds a deliciously nutty flavor and creamy texture to the cheesecake layer. Using a creamy variety ensures that it spreads easily and melds well with the other ingredients.
1 cup powdered sugar
Powdered sugar sweetens the filling while also contributing to its light, airy texture. Its fine granules dissolve quickly, ensuring a smooth mixture without any gritty texture.
1 tsp vanilla extract
Vanilla extract enhances the flavor profile of the bars, adding warmth and depth to the overall taste. It’s a small but mighty ingredient that makes a significant difference.
1 cup whipped topping
Whipped topping adds lightness to the cream cheese and peanut butter mixture, making it fluffy and easy to spread. It also adds a hint of sweetness that complements the dessert perfectly.
½ cup chocolate chips, melted (for topping)
Melted chocolate chips provide a beautiful drizzle on top that not only enhances the visual appeal but also amplifies the chocolate flavor. It’s the finishing touch that makes these bars truly irresistible.
Step-by-Step Chocolate Peanut Butter Cheesecake Bars Instructions
Preparing Your Chocolate Peanut Butter Cheesecake Bars
Making these Chocolate Peanut Butter Cheesecake Bars is a breeze! With a prep time of just 15 minutes and a cook time of 30 minutes, you’ll have a delicious dessert ready in a total of 45 minutes. For this recipe, you’ll need an 8×8-inch baking dish, mixing bowls, and a spatula to bring everything together.
1- Start by preheating your oven to 350°F (175°C). This step ensures that your bars bake evenly and develop that perfect texture. While the oven heats up, grab your chocolate sandwich cookies and crush them into fine crumbs. You can do this in a food processor or by placing them in a zip-top bag and using a rolling pin.
2- In a mixing bowl, combine the crushed cookies with the melted unsalted butter. Stir until the crumbs are well coated and the mixture resembles wet sand. Press this mixture firmly into the bottom of your baking dish to form an even crust. Bake it in the preheated oven for about 10 minutes until slightly firm. This step helps set the crust and gives it a nice texture.
3- While the crust is baking, prepare the cheesecake filling. In a large mixing bowl, beat the softened cream cheese until smooth, about 2-3 minutes. This will eliminate any lumps and create a creamy base for your filling. Add in the creamy peanut butter and continue mixing until combined. You’ll notice the mixture becoming silky and rich.
4- Gradually add the powdered sugar and vanilla extract, mixing until fully incorporated. The filling should be smooth and slightly fluffy. Gently fold in the whipped topping, which adds that airy quality to the cheesecake. The mixture should be light and creamy, ready to be spread over your crust.
5- Once the crust has baked and cooled slightly, pour the peanut butter cheesecake mixture over it, spreading it evenly with a spatula. The filling should be luscious and inviting, filling your kitchen with a delightful aroma.
6- For the final touch, melt the chocolate chips in a microwave-safe bowl or over a double boiler until smooth. Drizzle the melted chocolate over the cheesecake layer, creating a beautiful pattern. Chill the bars in the refrigerator for at least 30 minutes before slicing into 12 servings. When you serve them, you’ll see the glossy chocolate on top, the creamy filling, and that crunchy crust—pure bliss!
Pro Tips for Success
To ensure your Chocolate Peanut Butter Cheesecake Bars turn out perfectly, here are some expert tips to keep in mind:
- Make sure your cream cheese is at room temperature for easy blending. Cold cream cheese can lead to lumps in your filling.
- Press the crust mixture firmly into the pan to create a solid base. This will help the bars hold their shape when sliced.
- Let the bars chill for at least 30 minutes before cutting. This allows the filling to set up nicely and makes serving easier.
- If you prefer a thicker crust, feel free to increase the amount of crushed cookies and butter slightly.
- Experiment with toppings! Consider adding chopped nuts or a sprinkle of sea salt for an extra flavor boost.
Serving and Storing Your Chocolate Peanut Butter Cheesecake Bars
Perfect Pairings for Chocolate Peanut Butter Cheesecake Bars
These Chocolate Peanut Butter Cheesecake Bars make for a fantastic dessert that serves 12, perfect for sharing at gatherings or enjoying with family. Pair them with a scoop of vanilla ice cream for an extra touch of indulgence. The creaminess of the ice cream complements the rich bars beautifully.
For beverages, consider serving them with a glass of cold milk or a rich cup of coffee. The chocolate and peanut butter flavors shine when paired with a robust drink, balancing the sweetness of the bars. They’re also perfect for special occasions like birthday parties, potlucks, or a cozy night in with friends.
Storage and Make-Ahead Tips
To store your Chocolate Peanut Butter Cheesecake Bars, place them in an airtight container in the refrigerator. They’ll stay fresh for up to five days, but I doubt they’ll last that long! If you want to make them ahead of time, you can prepare the bars a day or two in advance.
For longer storage, you can freeze the bars. Wrap them tightly in plastic wrap and then place them in a freezer-safe container. They can be stored in the freezer for up to three months. When you’re ready to enjoy them, simply thaw them in the refrigerator overnight.
To reheat, you can microwave a slice for about 15-20 seconds, but I recommend enjoying them chilled for the best texture and flavor.
Variations and Dietary Adaptations for Chocolate Peanut Butter Cheesecake Bars
Creative Chocolate Peanut Butter Cheesecake Bars Variations
These Chocolate Peanut Butter Cheesecake Bars are versatile, so feel free to get creative! Here are a few variations you might enjoy:
- Mint Chocolate Peanut Butter Bars: Add a few drops of peppermint extract to the filling and top with crushed mint candies for a refreshing twist.
- Nutty Crunch Bars: Fold in some chopped peanuts or almonds into the filling for added texture and nutty flavor.
- Swirled Chocolate Bars: Before chilling, swirl some additional melted chocolate into the filling for a marbled effect that’s as pretty as it is tasty.
- Seasonal Pumpkin Bars: Substitute half of the peanut butter with pumpkin puree and add pumpkin spice for a fall-inspired treat.
Making Chocolate Peanut Butter Cheesecake Bars Diet-Friendly
Adapting this recipe to meet dietary needs is easier than you might think! Here are some substitutions for those with dietary restrictions:
- Gluten-Free: Use gluten-free chocolate sandwich cookies for the crust to make these bars suitable for gluten-sensitive individuals.
- Vegan: Substitute the cream cheese with a vegan cream cheese alternative and use coconut cream for the whipped topping. Ensure the chocolate chips are dairy-free as well.
- Low-Carb: Swap the powdered sugar for a low-carb sweetener like erythritol or stevia and use crushed nuts instead of cookies for the crust.
These adjustments ensure everyone can enjoy the delightful flavors of Chocolate Peanut Butter Cheesecake Bars!
Frequently Asked Questions
Q: Can I substitute the chocolate sandwich cookies for another type of cookie?
A: Absolutely! You can use any chocolate cookie or even graham crackers if you prefer a different flavor profile. Just make sure they are finely crushed for the crust.
Q: How can I ensure the bars set properly in the 45-minute total time?
A: Allow the bars to chill for at least 30 minutes after baking, as this helps them set properly. Cooling them completely in the refrigerator before slicing is key.
Q: How should I store the leftover bars?
A: Store the bars in an airtight container in the refrigerator for up to five days. If you want to keep them longer, freeze them for up to three months.
Q: How can I scale this recipe if I need more or fewer servings?
A: The recipe serves 12, but you can easily double it for larger gatherings or cut the ingredients in half for a smaller batch. Just adjust the baking dish size accordingly.
Q: What should I do if my bars are too soft after baking?
A: If your bars are too soft, they may need more chilling time. Ensure they are completely cooled and then chill them for an extended period in the refrigerator to firm up.
Conclusion
I hope you’re as excited as I am to whip up these Chocolate Peanut Butter Cheesecake Bars! They’re a delightful treat that’s perfect for any occasion, and I can’t wait for you to try them. The creamy peanut butter filling and crunchy chocolate crust are sure to leave everyone wanting more.
If you give this recipe a go, I’d love to hear how it turned out for you! Feel free to share your thoughts in the comments, and don’t forget to share this recipe with your friends. Happy baking!