
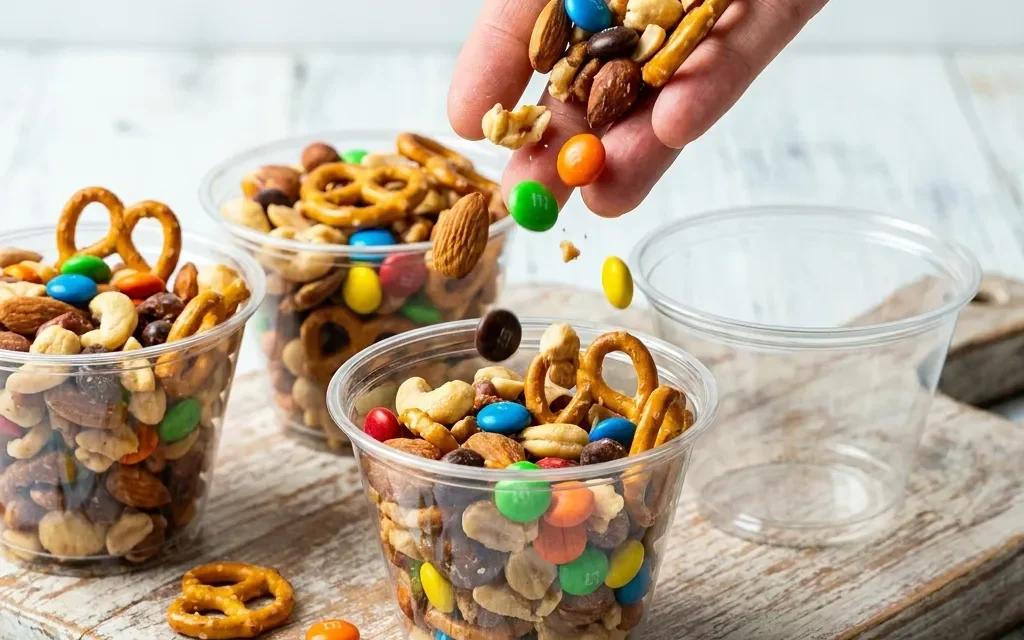
I remember the first time I made Trail Mix Snack Cups for a family gathering. It was a crisp autumn afternoon, and we were all gathered at my cousin’s house for a cozy get-together. I wanted to bring something that wasn’t just tasty but also a bit healthier than the usual chips and cookies. That’s when I decided to whip up these delightful Trail Mix Snack Cups. With all the kids running around and the adults engaged in spirited conversations, I needed a snack that was easy to grab and eat without fuss.
As I mixed together the nuts, dried fruits, and a sprinkle of chocolate, the aroma filled the kitchen, teasing everyone’s curiosity. I remember the excitement on the kids’ faces when I handed them their own little cups filled with colorful treats. Each cup was like a treasure trove of flavors, and they were a hit! The combination of almonds, walnuts, and cashews with sweet cranberries and chocolate was a crowd-pleaser.
What made it even better was how no one could resist going back for seconds. The best part? It took me just 15 minutes to prepare! Since then, these Trail Mix Snack Cups have become my go-to snack for gatherings and road trips alike. It’s such a simple recipe but one that brings people together, making it perfect for any occasion. Whether you’re hiking, having a picnic, or just enjoying a movie night at home, these cups are a delightful addition.
Why This Trail Mix Snack Cups Recipe Will Become Your Go-To
The Secret Behind Perfect Trail Mix Snack Cups
What makes these Trail Mix Snack Cups truly special is their versatility and ease of preparation. You can customize them to suit your taste or dietary preferences while still keeping that delightful crunch and sweetness. The balance of salty mixed nuts with sweet dried fruits and chocolate chips creates a tantalizing explosion of flavors in every bite.
Not to mention, there’s no cooking involved! It’s just a matter of combining ingredients, making it an accessible recipe for anyone, even if you’re not a seasoned cook. These cups are perfect for kids and adults alike, making them an ideal snack for family gatherings, school events, or even just to have on hand for a quick, nutritious bite throughout the week. Plus, they’re portable! Each cup is easy to grab, making them fantastic for road trips or hiking adventures.
Essential Ingredients You’ll Need
To whip up these delectable Trail Mix Snack Cups, you’ll need a few key ingredients that not only enhance the flavor but also provide nutritional benefits:
1 cup mixed nuts (almonds, walnuts, cashews)
Mixed nuts are packed with healthy fats, protein, and fiber. They not only add a satisfying crunch but also keep you feeling full longer, making them an excellent base for your Trail Mix Snack Cups.
1 cup dried fruit (cranberries, raisins, apricots)
Dried fruits bring natural sweetness and chewiness to the mix. Cranberries add a tart flavor, while raisins and apricots provide a touch of sweetness. They also contribute antioxidants and vitamins, making your snack even more nutritious.
1/2 cup dark chocolate chips
Dark chocolate chips are the perfect indulgence in these cups, providing a rich, slightly bitter contrast to the sweetness of the dried fruit. Plus, dark chocolate is known for its health benefits, including antioxidants and mood-boosting properties.
1/2 cup granola
Granola adds an additional layer of crunch and flavor. It’s often made with oats and sweeteners, providing a hearty texture and some wholesome grains to the mix.
1/4 cup mini marshmallows
Mini marshmallows add a fun, fluffy sweetness that appeals to kids and adults alike. They create a delightful surprise in every bite, enhancing the overall texture of your Trail Mix Snack Cups.
12 paper or silicone cups
These cups are essential for portioning out your Trail Mix Snack Cups. They make serving easy and keep everything contained, making it simple to grab and go.
Step-by-Step Trail Mix Snack Cups Instructions
Preparing Your Trail Mix Snack Cups
Making these Trail Mix Snack Cups is a breeze! You’ll need just 15 minutes of prep time with no cooking involved, bringing your total time to 15 minutes. All you’ll need is a mixing bowl, a spatula, and your choice of paper or silicone cups for serving.
1- Start by gathering all your ingredients on a clean countertop. In a large mixing bowl, toss together the 1 cup of mixed nuts, ensuring they’re evenly distributed. As you mix, take a moment to appreciate the contrasting textures and aromas of the nuts—crunchy almonds, buttery cashews, and earthy walnuts.
2- Next, add in your 1 cup of dried fruit. Make sure to incorporate them well with the nuts. The vibrant colors of cranberries, raisins, and apricots create a beautiful visual contrast. You want to have a nice balance of each ingredient in every cup, so mix gently but thoroughly.
3- Then, fold in the 1/2 cup of dark chocolate chips. The chocolate will start to slightly melt if you mix vigorously, so be gentle. You’ll want those little bursts of chocolate to remain intact for that delightful surprise when you take a bite.
4- After that, add the 1/2 cup of granola and 1/4 cup of mini marshmallows to the bowl. These ingredients will add even more texture and flavor. You’ll notice the mixture becoming thicker and more cohesive. Make sure everything is well-combined, and try to evenly distribute the chocolate chips and marshmallows.
5- Now comes the fun part! Spoon the mixture into your 12 paper or silicone cups. Fill each cup generously, making sure to pack them down slightly to hold everything together. You’ll want to see the colors and textures peeking through; it’s all about presentation.
6- Finally, arrange your filled cups on a platter or individual snack trays. The vibrant colors and varying textures will make them visually appealing. Serve them right away or store them in an airtight container if you’re preparing them ahead of time.
Pro Tips for Success
- Mix it up: Feel free to swap out the nuts or dried fruits for your favorites. Just keep the ratios the same to maintain the balance of flavors.
- Go for quality: Using high-quality dark chocolate chips can elevate the flavor of your Trail Mix Snack Cups. Look for brands with a higher cocoa content for a richer taste.
- Avoid sogginess: If you’re making these in advance, consider adding the marshmallows just before serving to keep them fluffy and prevent moisture from seeping into the mix.
- Portion control: These cups make it easy to control portions, but you can also create larger cups for sharing or family gatherings. Just adjust the quantities accordingly.
- Customize for events: For themed parties, consider adding seasonal ingredients, like pumpkin seeds in the fall or coconut flakes in the summer, to make them festive and fun!
Serving and Storing Your Trail Mix Snack Cups
Perfect Pairings for Trail Mix Snack Cups
These Trail Mix Snack Cups are a versatile snack that can be paired with various sides and drinks. Since this recipe serves 12 servings, it’s perfect for sharing at gatherings or as a healthy snack option throughout the week.
For a refreshing beverage, serve them alongside iced tea or lemonade. The sweetness of the treats balances nicely with the tartness of lemonade, making for a great summertime snack. If you’re looking for something warm, a cup of hot cocoa or herbal tea pairs beautifully as well.
These cups also make a delightful addition to lunchboxes. Pack them alongside apple slices or carrot sticks for a balanced meal. You can even include them in a picnic basket, paired with sandwiches or wraps for a fun outdoor feast.
Storage and Make-Ahead Tips
Storing your Trail Mix Snack Cups is simple! If you have leftovers, place them in an airtight container and store them in the refrigerator for up to a week. This helps maintain the freshness of the nuts and prevents them from becoming stale.
If you want to make these ahead of time for an event, prepare them a day in advance. Just keep them covered in the fridge until you’re ready to serve. If you need to freeze them, you can do so, but I recommend leaving out the marshmallows until you’re ready to serve, as they can become hard when frozen.
To reheat, simply let them sit at room temperature for a bit before serving. If they’ve been refrigerated, a quick 5-minute thaw will have them ready to enjoy again!
Variations and Dietary Adaptations for Trail Mix Snack Cups
Creative Trail Mix Snack Cups Variations
Feeling adventurous? There are plenty of ways to mix up your Trail Mix Snack Cups! Here are a few creative variations to try:
- Tropical Twist: Swap out the dried fruit for tropical options like dried mango, pineapple, and coconut flakes for a beachy vibe.
- Spicy Kick: Add a sprinkle of cayenne or chili powder to the mixed nuts for a spicy version that tantalizes your taste buds.
- Nut-Free: For a nut-free version, use seeds like sunflower or pumpkin seeds instead of nuts, maintaining the same ratios for crunch and nutrition.
- Holiday Cheer: During the holidays, incorporate seasonal dried fruits like figs or dates and add cinnamon or nutmeg for a festive flavor.
Making Trail Mix Snack Cups Diet-Friendly
If you’re looking to adapt these Trail Mix Snack Cups for dietary restrictions, here are some specific swaps:
- Gluten-Free: Ensure that the granola you choose is certified gluten-free. Most dried fruits are naturally gluten-free, but check labels to be sure.
- Vegan: To make this vegan, simply use dairy-free dark chocolate chips and ensure your granola doesn’t contain honey or other animal products.
- Low-Carb: For a low-carb version, replace the dried fruits with unsweetened coconut flakes and use sugar-free dark chocolate chips.
- Sugar-Free: Use unsweetened dried fruit or a sugar substitute for the chocolate chips to keep sugar levels low without sacrificing taste.
Frequently Asked Questions
Q: Can I substitute the nuts for seeds?
A: Absolutely! You can replace the mixed nuts with seeds like sunflower or pumpkin seeds for a nut-free version. Just maintain the same measurements for balance.
Q: How long does it take to prepare these Trail Mix Snack Cups?
A: It only takes 15 minutes of prep time, with no cooking required, making this a quick and easy snack option!
Q: How should I store the leftovers?
A: Store any leftover Trail Mix Snack Cups in an airtight container in the refrigerator for up to a week for optimal freshness.
Q: How many servings does this recipe make?
A: This recipe yields 12 servings, making it perfect for gatherings, road trips, or as a snack throughout the week.
Q: What if I want to add more chocolate?
A: You can definitely increase the amount of dark chocolate chips if you love chocolate! Just be mindful not to overdo it, as it might overpower the other flavors.
Conclusion
I genuinely hope you’ll give these Trail Mix Snack Cups a try. They’re not only easy to whip up but also incredibly satisfying and versatile. Whether you’re looking for a quick snack, a fun treat for kids, or a healthy option for a gathering, these cups have you covered. Don’t hesitate to get creative with your ingredients, and make them your own!
If you enjoyed this recipe, please share your thoughts in the comments below or let me know how your Trail Mix Snack Cups turned out. I can’t wait to hear about your tasty creations!