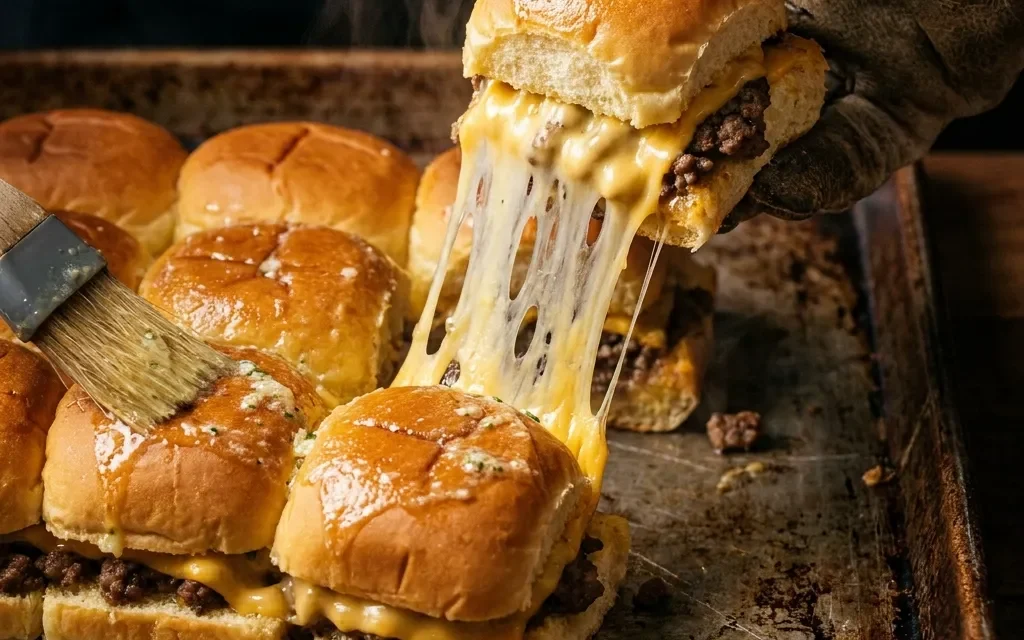
I still remember the first time I made Cheeseburger Sliders for a summer barbecue. It was a spontaneous decision, and I had just invited a few friends over, thinking it would be a casual get-together. But as the sun dipped low and the grill flared up, the atmosphere shifted. The aroma of sizzling beef wafting through the air had everyone gathering around, excited and hungry. I had this vision of mini burgers, juicy and packed with flavor, nestled in soft slider buns. As I flipped those patties, I couldn’t help but feel a rush of nostalgia, recalling backyard cookouts from my childhood where sliders were the highlight.
When I finally placed those Cheeseburger Sliders on the table, I was met with wide-eyed amazement. Friends dug in, and the sound of satisfied munching filled the air. The best part? They were easy to make, and everyone loved them! Each slider was a burst of flavor, complemented by classic toppings like pickles, lettuce, and a drizzle of ketchup. Watching my friends devour them reminded me of why I fell in love with cooking in the first place: it brings people together. Now, I can’t imagine a gathering without these delicious Cheeseburger Sliders. Whether it’s a holiday, game day, or just a weekend hangout, these sliders have become a staple in my home and are sure to be a hit in yours too!
Why This Cheeseburger Sliders Recipe Will Become Your Go-To
The Secret Behind Perfect Cheeseburger Sliders
This Cheeseburger Sliders recipe stands out because of its simplicity and flavor-packed profile. The combination of garlic powder and onion powder enhances the beef without overwhelming it, giving you that classic burger taste. Plus, cooking them in batches means you can serve them hot and fresh, creating an irresistible appeal. The sliders are not just small burgers; they encapsulate the essence of a cheeseburger in each delightful bite. Using cheddar cheese that perfectly melts over the beef elevates the flavor even further, creating a gooey, delicious experience. It’s all about the balance – juicy beef, soft buns, and fresh toppings come together to make every slider a mini celebration of flavor. You’re not just making food; you’re creating memories!
Essential Ingredients You’ll Need
To whip up these amazing Cheeseburger Sliders, you’ll need the following ingredients:
1 pound ground beef
Ground beef is the star of the show here, and using good quality meat makes a world of difference. It provides that rich, beefy flavor we all crave in a cheeseburger.
1 teaspoon garlic powder
Garlic powder adds depth to the sliders. It infuses the meat with a subtle garlic flavor that pairs perfectly with the beef.
1 teaspoon onion powder
Onion powder complements the garlic and enhances the overall taste, giving the sliders that classic burger flavor without the hassle of chopping fresh onions.
1 teaspoon salt
Salt is essential for bringing out the natural flavor of the beef. It enhances every bite, ensuring your sliders are never bland.
1/2 teaspoon black pepper
Black pepper adds a slight kick and balances the richness of the beef, making the flavors pop.
12 slider buns
The slider buns are crucial for holding everything together. Choose soft, fluffy buns that can soak up the juices without falling apart.
6 slices cheddar cheese, halved
Cheddar cheese is a classic choice for cheeseburgers. Halving the slices allows for even melting over each slider, giving you that gooey, cheesy goodness.
Toppings: sliced pickles, lettuce, tomato, ketchup, mustard
These classic toppings bring texture and freshness to your Cheeseburger Sliders. They add crunch, acidity, and sweetness, making each bite well-rounded.
Step-by-Step Cheeseburger Sliders Instructions
Preparing your Cheeseburger Sliders is a breeze. With a prep time of just 15 minutes and a cook time of 30 minutes, you’ll have a total of 45 minutes before you can dive into these delicious bites. Before you start, gather your equipment: a grill or a skillet, a spatula, and a baking sheet for the finished sliders.
1- Begin by preheating your grill or skillet over medium-high heat. While it’s heating, take the ground beef and place it in a large mixing bowl. Add the garlic powder, onion powder, salt, and black pepper. Use your hands to mix everything gently, being careful not to overwork the meat, which can lead to tough sliders.
2- Once your grill or skillet is hot, divide the beef mixture into twelve equal portions. Shape each portion into a small patty, about the size of your slider buns. Make a slight indentation in the center of each patty to prevent them from puffing up while cooking. Carefully place the patties on the grill or skillet.
3- Cook the patties for about 3-4 minutes on one side without moving them. This helps develop a nice crust. When you see juices pooling on the top, it’s time to flip them. Use your spatula to turn each patty over gently.
4- After flipping, place half a slice of cheddar cheese on each patty. Cover the grill or skillet with a lid or foil to help the cheese melt. Cook for another 3-4 minutes until the cheese is gooey and the patties are cooked through. You want them to reach an internal temperature of 160°F for safety.
5- While the cheese is melting, you can prepare your slider buns. If you like, toast them on the grill for a minute or two until they’re golden and warm. This adds an extra layer of flavor and prevents the buns from getting soggy.
6- Once the cheese is melted and the patties are cooked, carefully remove them from the grill or skillet. Place each patty onto a slider bun and top with your favorite toppings: sliced pickles, lettuce, tomato, ketchup, and mustard. Serve immediately, and watch your guests dive in!
Pro Tips for Success
To ensure your Cheeseburger Sliders are a hit, here are a few expert tips to keep in mind:
- Don’t overmix the meat. Gently combine the ingredients to keep the sliders tender.
- Make sure your grill or skillet is hot enough before adding the patties. This will help achieve a perfect sear.
- Use a meat thermometer to check the internal temperature of the patties for safety and doneness.
- Feel free to experiment with different cheeses or toppings to create unique flavor combinations.
- If you’re serving a crowd, consider doubling the recipe – these sliders go fast!
Serving and Storing Your Cheeseburger Sliders
Perfect Pairings for Cheeseburger Sliders
These Cheeseburger Sliders serve 12, making them perfect for gatherings, game days, or family barbecues. To accompany your sliders, consider classic sides like crispy French fries, onion rings, or a fresh garden salad. For beverages, ice-cold sodas, iced tea, or craft beers pair wonderfully with the savory flavors of the sliders. If you’re looking for a festive touch, serve them alongside a batch of homemade potato salad or coleslaw for a well-rounded meal.
Storage and Make-Ahead Tips
If you find yourself with leftovers (which is rare!), store them in an airtight container in the refrigerator for up to three days. To reheat, simply place the sliders in the oven at 350°F for about 10 minutes or until warmed through. Alternatively, you can microwave them for about 30 seconds, but be aware that this might make the buns a bit soggy. If you’d like to make these sliders ahead of time, you can prepare the patties and freeze them raw. Just shape them, place them on a baking sheet, and freeze until solid. Then transfer them to a freezer bag. When you’re ready to cook, you can grill them directly from frozen, adding a few extra minutes to the cooking time.
Variations and Dietary Adaptations for Cheeseburger Sliders
Creative Cheeseburger Sliders Variations
Get creative with your Cheeseburger Sliders by trying out different variations. For a spicy kick, add jalapeños or pepper jack cheese. If you’re feeling adventurous, mix in barbecue sauce and top with crispy fried onions for a smoky twist. You can also make a breakfast version by adding a fried egg and bacon on top of the cheeseburger. For a delicious twist, try swapping the beef for ground turkey or lamb for a unique flavor profile.
Making Cheeseburger Sliders Diet-Friendly
If you’re looking for diet-friendly options, there are plenty of substitutions you can make. For a gluten-free version, use gluten-free slider buns or lettuce wraps instead of bread. If you’re aiming for a lower-carb option, consider using ground turkey or chicken and skip the buns altogether. For a vegetarian option, you can use store-bought veggie patties or make your own using black beans or lentils. Vegan cheese can easily replace cheddar for a plant-based approach.
Frequently Asked Questions
Q: Can I substitute ground beef for another protein?
A: Absolutely! Ground turkey, chicken, or even plant-based proteins work well as alternatives. Just adjust cooking times accordingly to ensure they’re fully cooked.
Q: How long does it take to make these sliders?
A: The total time for this recipe is 45 minutes, which includes 15 minutes for preparation and 30 minutes for cooking.
Q: Can I make these sliders ahead of time?
A: Yes! You can prepare the patties and freeze them raw. When you’re ready to cook, grill them from frozen, adding a few minutes to the cooking time.
Q: How many servings does this recipe make?
A: This recipe yields 12 sliders, which is perfect for gatherings or parties. Feel free to double the recipe if you have a larger crowd!
Q: What should I do if my sliders are dry?
A: If your sliders turn out dry, consider using higher-fat ground beef or adding a bit of Worcestershire sauce to the mix. This can help keep them moist and flavorful.
Conclusion
I can’t emphasize enough how delicious and easy these Cheeseburger Sliders are to make. They’re perfect for any gathering and will surely impress your friends and family. So why not give them a try? I’d love to hear how yours turn out! Feel free to share your thoughts in the comments, and don’t forget to share this recipe with fellow burger lovers. You’re just a few steps away from creating a memorable meal that everyone will enjoy!