
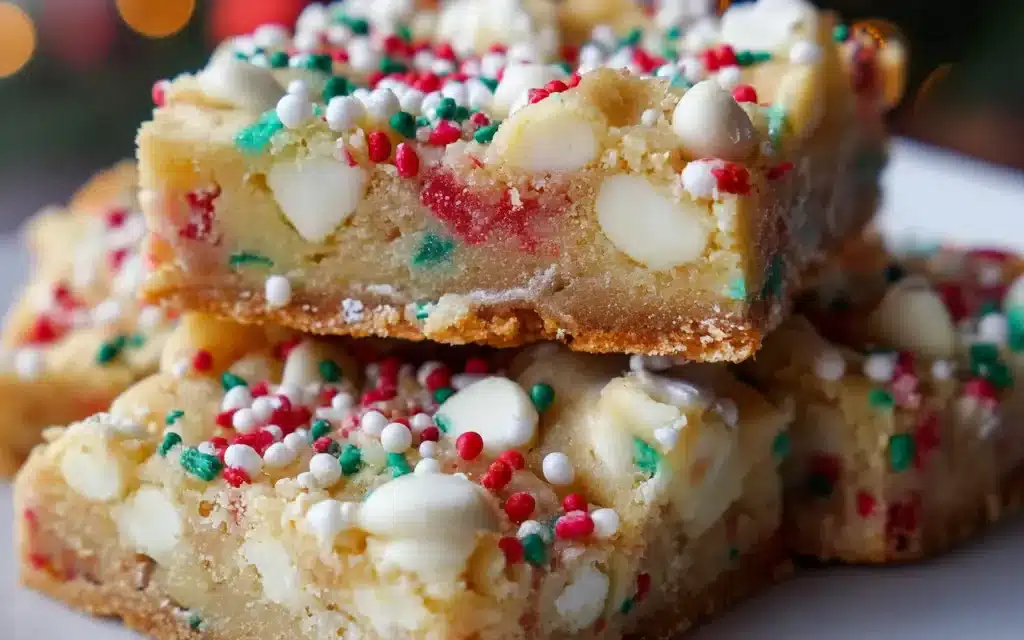
Twas the night before Christmas, and I was knee-deep in a baking frenzy. It all started when my neighbor, old Mrs. Wilkins, dropped by with a plate of her famous Christmas Cookie Bars. One bite, and I was hooked – the buttery, crumbly crust, the gooey chocolate chips, and the festive red and green sprinkles made my taste buds dance with joy. I just had to get my hands on that recipe.
After a little sweet-talking (and maybe a batch of my famous peanut butter blossoms), Mrs. Wilkins finally caved and shared her secret. And let me tell you, these Christmas Cookie Bars have been a staple in my holiday baking repertoire ever since. They’re the first thing I make every December, and they always disappear in a flash – my coworkers, neighbors, and even the grumpy old mailman can’t seem to get enough of them.
Why This Christmas Cookie Bars Recipe Will Become Your Go-To
The Secret Behind Perfect Christmas Cookie Bars
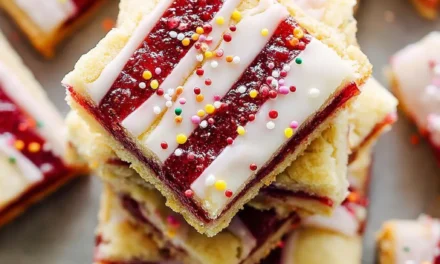
What makes these Christmas Cookie Bars so irresistible, you ask? It’s all in the technique. See, Mrs. Wilkins has this unique way of layering the ingredients that creates the most incredible texture. The buttery shortbread crust forms a sturdy base, while the gooey, fudgy middle layer is downright decadent. And let’s not forget the crowning glory – a generous sprinkling of festive sprinkles that add a satisfying crunch.
Essential Ingredients You’ll Need
– Unsalted butter: This is the foundation of the recipe, so make sure to use high-quality butter for maximum flavor.
– Granulated sugar: The perfect balance of sweetness to complement the rich butter.
– All-purpose flour: The base for the crumbly, shortbread-like crust.
– Baking powder: Just a touch to help the bars rise and achieve that perfect texture.
– Salt: A small amount enhances the other flavors and prevents the bars from tasting flat.
– Eggs: Binds the ingredients together and gives the bars their signature chewiness.
– Vanilla extract: Adds a warm, aromatic touch that takes these Christmas Cookie Bars to the next level.
– Chocolate chips: The star ingredient! Use a combination of milk and semi-sweet for the ultimate chocolate experience.
– Christmas sprinkles: These festive little gems are the finishing touch that makes these bars truly special.
Step-by-Step Christmas Cookie Bars Instructions
Preparing Your Christmas Cookie Bars
Get ready to bake up a batch of holiday magic! This Christmas Cookie Bars recipe is a straightforward process that takes just about an hour from start to finish. You’ll need a 9×13 inch baking pan, a few standard baking tools, and a little Christmas cheer.
1- Preheat your oven to 350°F and grease your baking pan. This will ensure the bars release cleanly when it’s time to cut them.
2- In a large mixing bowl, cream together the butter and sugar until light and fluffy. This step is crucial for creating the perfect shortbread-like texture.
3- Beat in the eggs one at a time, then stir in the vanilla extract. The eggs will help bind everything together.
4- Gradually add the flour, baking powder, and salt, mixing just until the dough comes together. You don’t want to overmix here.
5- Press the dough evenly into the prepared baking pan, then sprinkle the chocolate chips and Christmas sprinkles on top.
6- Bake for 25-30 minutes, until the edges are golden brown and the center is set. Allow the bars to cool completely before cutting into squares.
Pro Tips for Success
The key to perfect Christmas Cookie Bars is all in the technique. First, be sure not to overmix the dough – this can lead to a tough, dry crust. Secondly, keep an eye on the baking time and don’t be afraid to let the bars go a little longer if the center still looks underdone. And lastly, be patient when it comes to the cooling process. Cutting into the bars too soon can result in a crumbly, messy texture.
Serving and Storing Your Christmas Cookie Bars
Perfect Pairings for Christmas Cookie Bars
These Christmas Cookie Bars are the ultimate holiday indulgence, but they’re also surprisingly versatile. Serve them up with a steaming mug of hot cocoa or eggnog for a classic Christmas pairing. Or, for a grown-up twist, try them alongside a glass of red wine or a festive cocktail. They also make a wonderful addition to any holiday cookie tray or dessert spread.
Storage and Make-Ahead Tips
The best part about these Christmas Cookie Bars is that they keep beautifully. Once the bars have cooled completely, you can store them in an airtight container at room temperature for up to 5 days. If you want to get a head start on your holiday baking, you can even make the dough up to 3 days in advance and keep it chilled in the fridge until you’re ready to bake.
Variations and Dietary Adaptations for Christmas Cookie Bars
Creative Christmas Cookie Bars Variations
While the classic version is hard to beat, you can easily switch things up with these Christmas Cookie Bars. Try swapping out the chocolate chips for peppermint chips or crushed candy canes for a minty twist. Or, for a nutty flavor, fold in some chopped pecans or walnuts. You can even use a combination of white chocolate and cranberries for a festive red-and-white look.
Making Christmas Cookie Bars Diet-Friendly
If you’re looking to lighten things up, you can make these Christmas Cookie Bars a bit more diet-friendly. Swap out the all-purpose flour for a gluten-free blend, and use sugar-free chocolate chips or carob chips instead of regular chocolate. For a vegan version, replace the butter with coconut oil or a plant-based butter alternative, and use flax eggs in place of the regular eggs.
Frequently Asked Questions
Q: Can I use a different type of chocolate in these Christmas Cookie Bars?
A: Absolutely! While the classic version calls for a combination of milk and semi-sweet chocolate chips, you can use any type of chocolate you prefer. Dark chocolate, white chocolate, or even a mix of various chips and chunks will work perfectly.
Q: How long do these Christmas Cookie Bars need to cool before cutting?
A: It’s essential to let the bars cool completely before cutting, as this will ensure a clean, neat slice. I recommend allowing them to cool for at least 30 minutes, but an hour or more is even better.
Q: Can I make these Christmas Cookie Bars ahead of time?
A: Yes, these bars freeze beautifully! Once they’re cooled, you can wrap them tightly in plastic wrap or foil and freeze for up to 3 months. When you’re ready to serve, just thaw them at room temperature.
Q: How many Christmas Cookie Bars does this recipe make?
A: This recipe will yield 24 generous-sized bars, perfect for sharing with friends, family, and all your holiday guests.
Q: What if my Christmas Cookie Bars come out too dry?
A: If your bars end up a bit on the dry side, try reducing the baking time by a few minutes next time. You can also try adding an extra egg or a splash of milk to the dough to help keep them moist and fudgy.

Christmas Cookie Bars
- Total Time: 40
- Yield: 24 bars
Description
Grandma’s irresistible Christmas Cookie Bars are a classic holiday treat with a buttery, crumbly crust and a rich, fudgy chocolate topping. These easy-to-make bars are perfect for bake sales, holiday parties, or cozy nights by the fireplace.
Ingredients
– 2 cups all-purpose flour
– 1 teaspoon baking powder
– 1/2 teaspoon salt
– 1 cup unsalted butter, softened
– 1 cup granulated sugar
– 2 large eggs
– 1 teaspoon vanilla extract
– 1 cup semi-sweet chocolate chips
– Powdered sugar for dusting
Instructions
1. – Preheat the oven to 350°F. Grease a 9×13-inch baking pan.
2. – In a medium bowl, whisk together the flour, baking powder, and salt.
3. – In a large bowl, beat the butter and sugar until light and fluffy, about 2-3 minutes.
4. – Add the eggs one at a time, beating well after each addition. Stir in the vanilla.
5. – Gradually mix the dry ingredients into the wet ingredients until just combined.
6. – Spread the dough evenly into the prepared baking pan.
7. – Sprinkle the chocolate chips evenly over the top.
8. – Bake for 25-30 minutes, until the edges are lightly golden and the center is set.
9. – Allow the bars to cool completely before cutting into squares.
10. – Dust with powdered sugar before serving.
Notes
– For an extra festive touch, add holiday-themed sprinkles or crushed peppermint on top.
– Store the bars in an airtight container at room temperature for up to 5 days.
- Prep Time: 15
- Cook Time: 25
- Category: Dessert
- Method: Baking
- Cuisine: American
Conclusion
There’s nothing quite like a plate of homemade Christmas Cookie Bars to get you into the holiday spirit. With their irresistible layers of buttery shortbread, gooey chocolate, and festive sprinkles, these bars are guaranteed to become a new family favorite. So, grab your apron, crank up the Christmas tunes, and get ready to bake up a batch of pure holiday magic. I can’t wait to hear how your Christmas Cookie Bars turn out!
