
Growing up, there was nothing quite like the smell of freshly baked Dinner Rolls wafting through our home. My grandma would spend hours kneading the dough, her hands working the supple mixture with the kind of care and attention that only comes from years of practice. As the rolls rose, we’d all gather around the kitchen, eager to catch a glimpse of those golden, fluffy beauties emerging from the oven.
Dinner Rolls were always the star of the show, stealing the spotlight from even the most decadent main dishes. There was just something so comforting and satisfying about tearing into a warm, buttery roll, the soft interior melting in your mouth. It’s a ritual I’ve carried on in my own kitchen, and now I’m excited to share my go-to Dinner Rolls recipe with you.
Why This Dinner Rolls Recipe Will Become Your Go-To
This Dinner Rolls recipe is the perfect balance of simplicity and flavor. While some recipes can be overly complicated, this one sticks to the essentials, resulting in Dinner Rolls that are utterly irresistible. The secret lies in the perfect rise, achieved through a combination of proofing techniques, and the rich, buttery taste that comes from using high-quality ingredients.
The Secret Behind Perfect Dinner Rolls
The key to making these Dinner Rolls truly exceptional is in the proofing process. By allowing the dough to rise twice, you end up with Dinner Rolls that are light, airy, and bursting with flavor. The first rise helps develop the gluten structure, while the second rise gives the Dinner Rolls their signature fluffy texture. Plus, the addition of butter and a touch of honey lend a depth of flavor that will have your guests reaching for seconds (or thirds!).
Essential Ingredients You’ll Need
- Warm water: The perfect temperature is crucial for activating the yeast and ensuring a proper rise.
- Active dry yeast: This is the leavening agent that will make your Dinner Rolls rise to new heights.
- All-purpose flour: The foundation of the Dinner Rolls, providing structure and texture.
- Granulated sugar: A small amount of sugar helps balance the flavors and feed the yeast.
- Unsalted butter: Adding butter to the dough gives the Dinner Rolls a rich, indulgent taste.
- Salt: Just a pinch enhances the overall flavor profile.
- Honey: A touch of sweetness complements the savory notes of the Dinner Rolls.
Step-by-Step Dinner Rolls Instructions
Preparing Your Dinner Rolls
Get ready to bake up a batch of the most irresistible Dinner Rolls you’ve ever tasted. This recipe is straightforward, with a total prep and cook time of about 2 hours. You’ll need a few key pieces of equipment, including a stand mixer with a dough hook attachment, a large bowl for proofing, and a baking sheet.
1- Start by proofing the yeast in warm water, allowing it to activate and become bubbly. This step is crucial for ensuring your Dinner Rolls rise to perfection.
2- In the bowl of your stand mixer, combine the proofed yeast, flour, sugar, melted butter, salt, and honey. Using the dough hook attachment, knead the mixture until a smooth, elastic dough forms.
3- Transfer the dough to a lightly greased bowl, cover it with a damp towel, and let it rise in a warm place for about an hour, or until it’s doubled in size.
4- Punch down the dough to release any air bubbles, then divide it into 12 equal pieces. Roll each piece into a smooth ball and arrange them on a parchment-lined baking sheet.
5- Cover the Dinner Rolls and let them rise for another 30 minutes, until they’re puffy and nearly doubled in size.
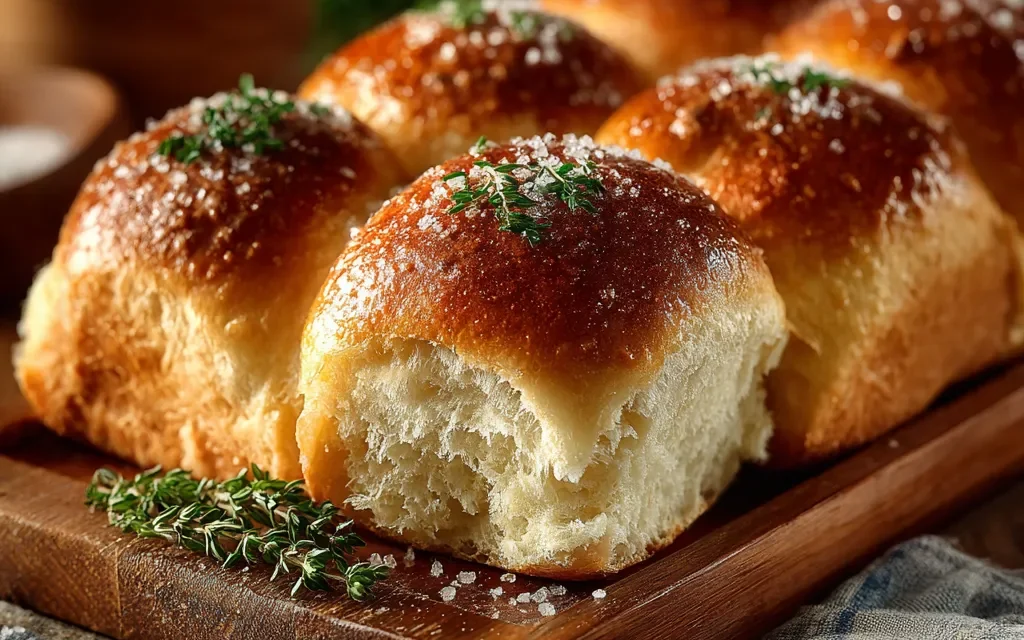
6- Bake the Dinner Rolls in a preheated oven until they’re golden brown, about 15-18 minutes. Brush the tops with melted butter as soon as they come out of the oven for an extra-indulgent finish.
Pro Tips for Success
- Make sure your yeast is fresh and active for the best rise.
- Don’t overheat the water, as it can kill the yeast and prevent the Dinner Rolls from rising properly.
- Resist the urge to open the oven door too often, as this can cause the Dinner Rolls to collapse.
- For even more flavor, try brushing the tops with a mixture of melted butter and garlic powder before baking.
Serving and Storing Your Dinner Rolls
Perfect Pairings for Dinner Rolls
Dinner Rolls are the ultimate accompaniment to any main course, from roasted chicken to hearty stews. They’re especially delicious served alongside a savory pot roast or a rich, creamy pasta dish. For a simple yet satisfying meal, pair your Dinner Rolls with a fresh green salad and a glass of your favorite red wine.
Storage and Make-Ahead Tips
Leftover Dinner Rolls can be stored at room temperature in an airtight container for up to 3 days. If you want to enjoy them for longer, simply freeze the Dinner Rolls for up to 2 months. To reheat, thaw them at room temperature and then warm them in a 350°F oven for 5-10 minutes.
For make-ahead convenience, you can prepare the dough up to 2 days in advance. Simply cover the dough and refrigerate it until you’re ready to shape and bake the Dinner Rolls. When it’s time to bake, let the dough come to room temperature before shaping and proofing.
Variations and Dietary Adaptations for Dinner Rolls
Creative Dinner Rolls Variations
If you’re feeling adventurous, you can easily customize your Dinner Rolls by adding various mix-ins or toppings. Try incorporating shredded cheese, chopped herbs, or even a sprinkle of cinnamon and sugar for a sweet twist. You can also shape the Dinner Rolls into different forms, like knots or crescents, to change up the presentation.
Making Dinner Rolls Diet-Friendly
For those following a gluten-free diet, you can easily adapt this Dinner Rolls recipe by using a high-quality gluten-free flour blend in place of the all-purpose flour. To make vegan Dinner Rolls, substitute the butter with a plant-based alternative, such as coconut oil or vegan margarine, and use plant-based milk instead of water.
Frequently Asked Questions
Q: Can I use bread flour instead of all-purpose flour?
A: While bread flour will work, all-purpose flour is the better choice for this Dinner Rolls recipe. Bread flour has a higher protein content, which can result in a chewier texture that may not be as light and fluffy as you’d want for Dinner Rolls.
Q: How long do I need to knead the dough?
A: You’ll want to knead the dough for about 5-7 minutes, or until it becomes smooth, elastic, and passes the “windowpane test.” To do this, stretch a small piece of dough – if it can be stretched thin enough to see light through it without tearing, it’s ready.
Q: Can I freeze the baked Dinner Rolls?
A: Absolutely! Baked Dinner Rolls can be frozen for up to 2 months. To reheat, simply thaw them at room temperature and then warm them in a 350°F oven for 5-10 minutes.
Q: How many Dinner Rolls does this recipe make?
A: This recipe yields 12 medium-sized Dinner Rolls. If you’d like to make smaller rolls, you can divide the dough into 16 or 18 pieces instead.
Q: Why did my Dinner Rolls turn out dense or heavy?
A: If your Dinner Rolls ended up dense or heavy, it could be due to a few reasons: the dough was overkneaded, the yeast was old or inactive, or the dough didn’t have enough time to rise properly. Make sure to follow the proofing instructions carefully to ensure light and fluffy Dinner Rolls.

Dinner Rolls
- Total Time: 48
- Yield: 12
Description
Indulge in the aroma and flavor of these effortless, homemade dinner rolls. Soft, fluffy, and baked to golden-brown perfection, they’re the perfect accompaniment to any meal.
Ingredients
– 3 cups all-purpose flour
– 1 tablespoon granulated sugar
– 1 teaspoon salt
– 1 packet (2 1/4 teaspoons) active dry yeast
– 1 cup warm milk
– 4 tablespoons unsalted butter, melted
– 1 egg, beaten
Instructions
1. 1. In a large bowl, combine the flour, sugar, salt, and yeast. Stir to mix.
2. 2. Add the warm milk, melted butter, and beaten egg. Use a wooden spoon or your hands to mix the ingredients until a shaggy dough forms.
3. 3. Turn the dough out onto a lightly floured surface and knead for about 5 minutes, until the dough becomes smooth and elastic.
4. 4. Place the dough in a greased bowl, cover, and let rise for 30 minutes.
5. 5. Punch down the dough to release any air bubbles. Divide the dough into 12 equal pieces and shape each into a smooth ball.
6. 6. Place the dough balls in a greased 9×13 inch baking dish. Cover and let rise for another 30 minutes.
7. 7. Preheat the oven to 400°F (200°C).
8. 8. Bake the dinner rolls for 15-18 minutes, until they are golden brown on top.
9. 9. Brush the tops with melted butter and serve warm.
Notes
For extra fluffy rolls, let the dough rise for an additional 30 minutes before shaping. Leftover rolls can be stored in an airtight container for up to 3 days.
- Prep Time: 30
- Cook Time: 18
- Category: Breads
- Method: Baking
- Cuisine: American
Conclusion
There’s nothing quite like the aroma of freshly baked Dinner Rolls to bring people together. This recipe is sure to become a new family favorite, with its perfect balance of fluffy texture and rich, buttery flavor. I can’t wait for you to try it and experience the joy of tearing into a warm, homemade Dinner Roll. So, what are you waiting for? Preheat your oven and get ready to bake up a batch of these irresistible Dinner Rolls today!


