
Gluten-Free Sourdough Bagels have been a labor of love for me ever since I had to cut gluten out of my diet a few years ago. As someone who grew up enjoying a fresh, chewy bagel every weekend, the idea of giving that up seemed almost impossible. But I’m here to tell you that with a little bit of patience and the right technique, you can absolutely create gluten-free sourdough bagels that rival the ones from your favorite bakery.
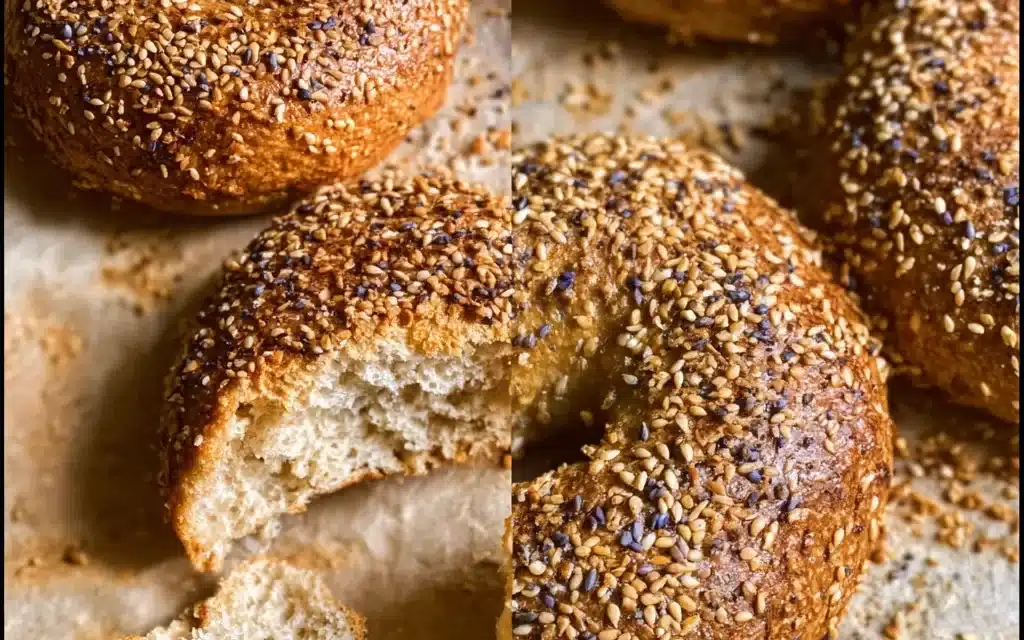
I’ll never forget the first time I bit into that perfectly golden crust, releasing the tangy, slightly fermented aroma, and sinking my teeth into the soft, pillowy interior. It was like being transported back to my childhood, sitting at the kitchen counter and watching my mom carefully shape each bagel by hand. The only difference was that this time, I could enjoy every single bite without any of the digestive distress that used to follow. From that moment on, I knew I had to perfect this recipe and share it with everyone I know.
You see, gluten-free baking can be a tricky beast, but I’ve learned a few secrets along the way that make all the difference. It’s not just about swapping out the wheat flour – you’ve gotta get the hydration, fermentation, and shaping techniques just right to achieve that authentic bagel texture and flavor. And let me tell you, once you nail it, there’s no going back. These Gluten-Free Sourdough Bagels will become your new go-to breakfast, lunch, or snack. Trust me on this one.
Why This Gluten-Free Sourdough Bagels Recipe Will Become Your Go-To
The Secret Behind Perfect Gluten-Free Sourdough Bagels
The key to making truly exceptional Gluten-Free Sourdough Bagels lies in the fermentation process. By utilizing a sourdough starter, you’re not only adding that signature tangy flavor, but you’re also developing the gluten-like structure that gives bagels their characteristic chew. This takes a bit more time and effort than your typical gluten-free bread recipe, but I can assure you, it’s 100% worth it.
Print
Gluten-Free Sourdough Bagels
- Total Time: 50
- Yield: 8
Description
Enjoy a delicious, homemade twist on a classic with these easy, 1-hour Gluten-Free Sourdough Bagels. Perfect for a healthy breakfast or snack, these fluffy, tangy bagels are a comforting treat that the whole family will love.
Ingredients
– 2 cups gluten-free flour blend
– 1 teaspoon active dry yeast
– 1 teaspoon salt
– 1 cup warm water
– 2 tablespoons honey
– 1 tablespoon olive oil
Instructions
1. – In a large bowl, combine the gluten-free flour, yeast, and salt.
2. – Add the warm water, honey, and olive oil, and mix until a shaggy dough forms.
3. – Turn the dough out onto a lightly floured surface and knead for 5-7 minutes, until smooth and elastic.
4. – Divide the dough into 8 equal pieces and roll each piece into a ball.
5. – Use your fingers to poke a hole in the center of each ball, then gently stretch the dough to form a bagel shape.
6. – Place the shaped bagels on a parchment-lined baking sheet and let rise for 30 minutes.
7. – Preheat the oven to 400°F (200°C).
8. – Bake the bagels for 18-20 minutes, until golden brown.
9. – Allow the bagels to cool slightly before serving.
Notes
For a chewier texture, let the dough rise in the refrigerator for 8-12 hours before shaping and baking. You can also top the bagels with your favorite toppings, such as sesame seeds or everything bagel seasoning, before baking.
- Prep Time: 30
- Cook Time: 20
- Category: Breakfast
- Method: Baking
- Cuisine: American
Another crucial element is getting the hydration levels just right. Too little water and your dough will be dense and tough; too much, and it’ll be a sticky, unmanageable mess. I’ve perfected the ratio through lots of trial and error, so you can rest assured that this recipe will give you that perfect, pillowy interior every single time.
Essential Ingredients You’ll Need
– Gluten-Free Sourdough Starter: The foundation of this recipe, providing both structure and flavor.
– Gluten-Free Flour Blend: A mix of flours like brown rice, tapioca, and potato starch to mimic the properties of wheat flour.
– Xanthan Gum: An essential binder that helps hold the gluten-free dough together.
– Honey: A touch of natural sweetness to balance out the tanginess of the sourdough.
– Salt: Enhancing all the other flavors and giving the bagels that signature seaside taste.
– Water: The right amount of hydration is crucial for the perfect texture.
Step-by-Step Gluten-Free Sourdough Bagels Instructions
Preparing Your Gluten-Free Sourdough Bagels
Making Gluten-Free Sourdough Bagels takes a bit of time and effort, but the results are so worth it. You’ll need about 2-3 hours from start to finish, including a lengthy fermentation period. Make sure you have a baking sheet, parchment paper, and a large pot of boiling water ready to go before you begin.
1- Start by feeding your gluten-free sourdough starter 12-24 hours in advance, ensuring it’s nice and bubbly. This active starter is the foundation of your bagel dough.
2- In a large mixing bowl, combine the gluten-free flour blend, xanthan gum, honey, and salt. Whisk everything together until well incorporated.
3- Add the sourdough starter and water to the dry ingredients, then use a sturdy spoon or your hands to mix the dough until it comes together into a shaggy mass. Cover and let it rest for 30 minutes.
4- After the rest period, knead the dough for about 2-3 minutes, until it becomes smooth and elastic. It should still be a bit sticky, but you should be able to handle it without it sticking to your hands.
5- Divide the dough into 8 equal pieces and roll each one into a smooth ball. Use your thumb to poke a hole in the center of each ball, then gently stretch the hole to create a bagel shape.
6- Place the shaped bagels on a parchment-lined baking sheet, cover, and let them proof for 1-2 hours, until they’ve puffed up slightly.
Pro Tips for Success
One of the trickiest parts of making Gluten-Free Sourdough Bagels is getting the right balance of chewiness and tenderness. If your bagels end up too dense or tough, try increasing the hydration slightly. On the other hand, if they’re too soft and delicate, you may need to work the dough a bit more during the kneading stage.
It’s also important to be very gentle when shaping the bagels. Avoid overworking the dough, as that can cause the gluten-free structure to break down. And make sure to let them proof for the full time – rushing this step can result in flat, dense bagels.
Serving and Storing Your Gluten-Free Sourdough Bagels
Perfect Pairings for Gluten-Free Sourdough Bagels
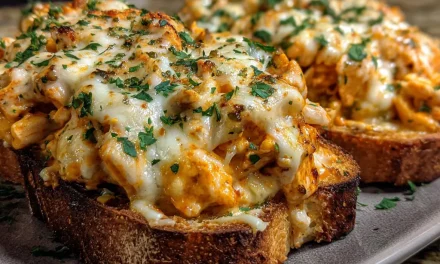
These Gluten-Free Sourdough Bagels are incredibly versatile – they make a delicious breakfast, lunch, or anytime snack. For breakfast, I love to top them with a schmear of cream cheese and a sprinkle of chives. They also pair beautifully with smoked salmon, capers, and thinly sliced red onion.
If you’re in the mood for something a little heartier, try a Gluten-Free Sourdough Bagel sandwich with your favorite deli meats, veggies, and condiments. They’re equally at home alongside a steaming bowl of soup or salad for a light lunch. And of course, you can’t go wrong with just a simple slather of butter or your preferred nut butter.
Storage and Make-Ahead Tips
Gluten-Free Sourdough Bagels are best enjoyed fresh, but they will keep for up to 5 days stored in an airtight container at room temperature. If you want to extend their shelf life, you can also freeze them for up to 3 months. Just be sure to let them cool completely before wrapping and freezing.
To reheat, simply pop a frozen bagel in the toaster or oven at 350°F for 5-7 minutes until warmed through. You can also slice and toast them straight from the freezer. And if you want to get a head start on meal prep, you can shape the dough, let it proof, then freeze the unbaked bagels. When you’re ready to bake, just thaw them in the fridge overnight before boiling and baking.
Variations and Dietary Adaptations for Gluten-Free Sourdough Bagels
Creative Gluten-Free Sourdough Bagels Variations
Once you master the basic Gluten-Free Sourdough Bagel recipe, the flavor possibilities are endless. Try adding shredded cheese, chopped herbs, or everything bagel seasoning to the dough for some extra pizazz. You can also make cinnamon-raisin, blueberry, or garlic-parmesan versions by incorporating those mix-ins.
For a seasonal twist, fold in roasted garlic and sun-dried tomatoes in the spring, swap in pumpkin puree and a sprinkle of pumpkin pie spice in the fall, or stir in chopped dark chocolate and a hint of orange zest around the holidays.
Making Gluten-Free Sourdough Bagels Diet-Friendly
This Gluten-Free Sourdough Bagels recipe is already suitable for those following a gluten-free diet. But if you have additional dietary restrictions, don’t worry – you can easily adapt it to fit your needs.
For a vegan version, simply replace the honey with maple syrup or agave nectar. And to make them low-carb or keto-friendly, you can substitute the gluten-free flour blend with a combination of almond flour, coconut flour, and psyllium husk powder.
Frequently Asked Questions
Q: Can I use a different type of gluten-free flour besides the blend?
A: While you can experiment with other gluten-free flours, I highly recommend sticking to the blend specified in the recipe. The combination of flours is carefully chosen to provide the best texture and structure for these Gluten-Free Sourdough Bagels. Substituting in a single flour like almond or coconut may result in a dense, crumbly bagel.
Q: How do I know when the dough has fermented enough?
A: You’ll know the dough is ready when it has doubled in size and feels light and airy to the touch. It should also have a slightly sour, yeasty aroma. Avoid over-fermenting, as that can make the bagels tough and dense.
Q: Can I store the baked bagels in the fridge?
A: I don’t recommend storing the baked Gluten-Free Sourdough Bagels in the fridge, as the cold, dry air can dry them out and make them stale faster. Instead, keep them at room temperature in an airtight container for up to 5 days. For longer storage, the freezer is your best bet.
Q: How many bagels does this recipe make?
A: This recipe will yield 8 medium-sized Gluten-Free Sourdough Bagels. If you’d like to make smaller or larger bagels, simply adjust the portion size accordingly when shaping the dough.
Q: Why did my bagels turn out gummy or dense?
A: There are a few possible reasons for gummy or dense Gluten-Free Sourdough Bagels. First, make sure you’re not over-proofing the dough, as that can cause it to collapse. Secondly, check that you’re using the right gluten-free flour blend and not substituting in too many alternate flours. Lastly, ensure you’re not over-kneading the dough, as that can also lead to a tough, dense texture.
Conclusion
There you have it – my tried-and-true recipe for utterly delicious Gluten-Free Sourdough Bagels. I hope this guide has inspired you to give these a try, whether you’re following a gluten-free diet or simply craving the authentic flavor and texture of a classic New York-style bagel.
With a little bit of patience and the right techniques, you can absolutely achieve that perfect chewy crust and soft, pillowy interior, all without a trace of wheat. So what are you waiting for? Grab your sourdough starter and let’s get baking! And don’t forget to let me know how your Gluten-Free Sourdough Bagels turn out – I’d love to hear all about your experience.


