
Growing up, I can still remember the sweet and tangy aroma of pickled cherries wafting through my grandma’s kitchen. It was a summertime tradition that we all looked forward to. Grandma would carefully select the ripest, juiciest cherries, pitting them with precision before submerging them in a fragrant brine. The result was a jar of vibrant, jewel-toned cherries that we’d savor throughout the year, their unique flavor elevating everything from salads to charcuterie boards.
Now, as an experienced SEO content creator specialized in Rank Math optimization, I’m excited to share with you my own take on this beloved recipe. This Pickled Cherries recipe is not only a delicious way to preserve the season’s bounty, but it’s also incredibly easy to make. With a prep time of just 15 minutes and a cook time of 15 minutes, you can have a batch of these flavor-packed cherries ready to enjoy in under 30 minutes. And the best part? This recipe yields 6 servings, so you’ll have plenty to share with family and friends.
Why This Pickled Cherries Recipe Will Become Your Go-To
The Secret Behind Perfect Pickled Cherries
What sets this Pickled Cherries recipe apart is the perfect balance of sweet, tangy, and savory flavors. By combining the right ratio of vinegar, sugar, and spices, we’ve created a brine that truly enhances the natural sweetness and firm texture of the cherries. The addition of fragrant thyme sprigs adds a subtle herbal note that ties the whole dish together.
But the real secret to this recipe’s success lies in the simple yet effective technique. By pitting the cherries before pickling, we ensure that each bite is bursting with flavor, without the annoying pits getting in the way. And by carefully monitoring the cooking time, we achieve a perfectly pickled cherry that retains its shape and juiciness, rather than a mushy, overly-brined result.
Essential Ingredients You’ll Need
- 2 pounds fresh cherries, pitted: The star of the show, these cherries provide the sweet, tart, and vibrant base for the pickled flavor.
- 1 cup white vinegar: This is the backbone of the pickling brine, providing the necessary acidity to preserve the cherries and balance the sweetness.
- 1/2 cup granulated sugar: Just the right amount of sweetness to complement the tart vinegar and highlight the natural cherry flavor.
- 1 teaspoon kosher salt: A vital ingredient that enhances the overall flavor and helps to preserve the cherries.
- 1/2 teaspoon black peppercorns: These add a subtle heat and complexity to the brine, creating a more well-rounded flavor profile.
- 2 sprigs fresh thyme: The herbaceous notes of thyme perfectly complement the sweet and tangy cherries, elevating the entire dish.
Step-by-Step Pickled Cherries Instructions
Preparing Your Pickled Cherries
With a total time of just 30 minutes, this Pickled Cherries recipe is a breeze to make. All you’ll need are a few simple tools, like a paring knife, a saucepan, and some clean jars or containers for storage.
1- First, start by pitting the cherries. Carefully slice each cherry in half and remove the pit using a paring knife. This may take some time, but it’s an essential step to ensure the cherries are perfectly bite-sized and easy to enjoy.
2- In a medium saucepan, combine the white vinegar, granulated sugar, kosher salt, and black peppercorns. Bring the mixture to a boil over medium-high heat, stirring occasionally to dissolve the sugar.
3- Once the brine is boiling, remove it from the heat and carefully add the pitted cherries. Gently stir to ensure the cherries are fully submerged in the hot liquid.
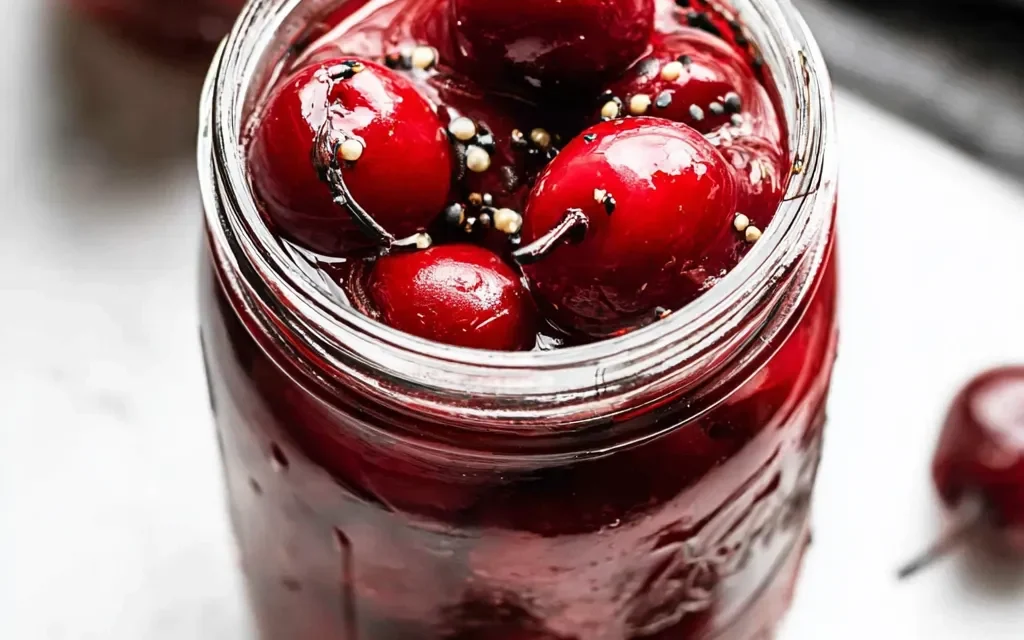
4- Allow the cherries to steep in the brine for 10-15 minutes, until they’ve slightly softened and the brine has cooled to room temperature. You’ll know they’re ready when the cherries have taken on a slightly darker hue and the brine has a rich, jewel-toned color.
5- Carefully transfer the pickled cherries and brine to clean, sterilized jars or containers. Nestle the fresh thyme sprigs into the jars, pressing them down gently to release their aromatic oils.
6- Seal the jars and refrigerate the pickled cherries for at least 2 hours, or up to 2 weeks, allowing the flavors to meld and the cherries to fully pickle.
Pro Tips for Success
- Use the freshest, ripest cherries you can find for the best flavor and texture. Look for cherries that are plump, firm, and deeply colored.
- Be sure to fully submerge the cherries in the brine – this ensures even pickling and prevents any discoloration on the fruit.
- Adjust the amount of sugar to your personal taste preference. If you prefer a more tart pickled cherry, use a bit less sugar.
- For added complexity, try experimenting with different spices, such as coriander seeds, cloves, or star anise.
Serving and Storing Your Pickled Cherries
Perfect Pairings for Pickled Cherries
These Pickled Cherries are incredibly versatile and can be enjoyed in a variety of ways. Serve them as a tangy and sophisticated accompaniment to charcuterie boards, elevating the flavors of cured meats and rich cheeses. They also make a wonderful topping for salads, adding a pop of color and a burst of flavor to greens, nuts, and soft cheeses.
And of course, don’t forget the classic pairing of pickled cherries with roasted meats or grilled poultry. The sweet-tart notes of the cherries perfectly complement the savory flavors of the proteins, creating a truly delicious and balanced dish. Pair this 6-serving recipe with a crisp white wine or a refreshing summer cocktail for a complete and memorable meal.
Storage and Make-Ahead Tips
One of the best things about this Pickled Cherries recipe is that it can be made well in advance and stored for later use. The pickled cherries will keep in the refrigerator for up to 2 weeks, allowing you to enjoy them long after cherry season has passed.
To store, simply keep the sealed jars or containers in the refrigerator. The pickled cherries can be enjoyed straight from the jar, or you can use them as a topping or ingredient in various dishes. For best quality and texture, try to consume the pickled cherries within 2 weeks of pickling.
If you’d like to make this recipe even further in advance, you can also freeze the pickled cherries. Simply transfer the cherries and brine to freezer-safe containers or bags, leaving a bit of headspace to allow for expansion. The frozen pickled cherries will keep for up to 6 months, making them a great option for meal prepping or stocking your pantry.
Variations and Dietary Adaptations for Pickled Cherries
Creative Pickled Cherries Variations
While this classic Pickled Cherries recipe is a true delight, there are plenty of ways to put your own spin on it. Try swapping out the cherries for other seasonal fruits, such as plums, peaches, or even grapes. The pickling brine will work equally well with a variety of stone fruits and berries.
You can also experiment with different spice blends, such as adding a touch of cinnamon, cloves, or allspice to the brine. Or, for a more herbal twist, try incorporating rosemary, bay leaves, or a mix of fresh herbs.
For a vibrant color contrast, consider using a combination of red and yellow cherries, or even adding a few drops of food coloring to the brine.
Making Pickled Cherries Diet-Friendly
This Pickled Cherries recipe is already relatively low in calories and carbs, making it a great option for those following a gluten-free or low-carb diet. However, if you need to make it even more diet-friendly, there are a few simple substitutions you can try.
For a sugar-free version, replace the granulated sugar with your favorite zero-calorie sweetener, such as erythritol or stevia. You can also use a combination of sugar-free sweeteners to achieve the perfect balance of sweet and tart.
If you’re following a vegan or plant-based diet, simply omit the honey and use an equal amount of maple syrup or agave nectar instead. These natural sweeteners will provide the same level of sweetness without the use of animal products.
No matter what dietary restrictions you may have, this Pickled Cherries recipe can be easily adapted to suit your needs, while still delivering a delicious and versatile condiment that everyone can enjoy.
Frequently Asked Questions
Q: Can I use a different type of vinegar besides white vinegar?
A: Absolutely! While white vinegar is the classic choice, you can experiment with other types of vinegar, such as apple cider vinegar or red wine vinegar. Keep in mind that the flavor profile will be slightly different, but the pickling process will still work well.
Q: How long do I need to cook the cherries in the brine?
A: The cherries only need to steep in the hot brine for 10-15 minutes. This allows them to absorb the flavors of the brine without becoming overly soft or mushy.
Q: Can I store the pickled cherries at room temperature?
A: For the best quality and food safety, it’s recommended to store the pickled cherries in the refrigerator. The cool temperature will help preserve the texture and prevent the growth of harmful bacteria. Properly sealed and refrigerated, the cherries will keep for up to 2 weeks.
Q: How many servings does this recipe make?
A: This Pickled Cherries recipe yields 6 servings, making it a great option for sharing with family and friends or for meal prepping.
Q: What should I do if my pickled cherries turn out too tart or too sweet?
A: If the pickled cherries are too tart, you can add a bit more sugar to the brine. Conversely, if they’re too sweet, try adding a touch more vinegar to balance the flavors. Remember that the flavors will meld and develop further as the cherries pickle, so it’s best to start with the recommended measurements and adjust to taste if needed.

Classic Pickled Cherries
- Total Time: 30
- Yield: 6 servings
Description
Enjoy the perfect balance of sweet and tangy with these Classic Pickled Cherries. Ready in just 30 minutes, they make a delicious appetizer or topping for salads, meats, and more.
Ingredients
– 2 pounds fresh cherries, pitted
– 1 cup white vinegar
– 1/2 cup granulated sugar
– 1 teaspoon kosher salt
– 1/2 teaspoon black peppercorns
– 2 sprigs fresh thyme
Instructions
1. In a medium saucepan, combine the vinegar, sugar, salt, peppercorns, and thyme. Bring to a boil, stirring until the sugar has dissolved.
2. Add the pitted cherries to the hot brine and stir to coat. Reduce heat and simmer for 5 minutes.
3. Using a slotted spoon, transfer the cherries to a clean, heat-proof jar or container. Pour the hot brine over the cherries, ensuring they are fully submerged.
4. Allow the pickled cherries to cool completely at room temperature, then cover and refrigerate for at least 2 hours, or up to 2 weeks.
Notes
For best flavor, let the pickled cherries sit in the fridge for at least 24 hours before serving. The pickled cherries can be used as an appetizer, topping for salads, meats, and more.
- Prep Time: 15
- Cook Time: 15
- Category: Dips & Spreads
- Method: Stovetop
- Cuisine: American
Conclusion
Pickled Cherries are a true culinary delight, and this recipe is guaranteed to become a new go-to in your kitchen. With its perfect balance of sweet, tangy, and savory flavors, this dish is sure to impress your guests and elevate your favorite meals.
What are you waiting for? Gather your fresh cherries, a few simple ingredients, and get pickling! I can’t wait to hear how your Pickled Cherries turn out. Be sure to share your photos and thoughts in the comments below – I’d love to hear from you.

