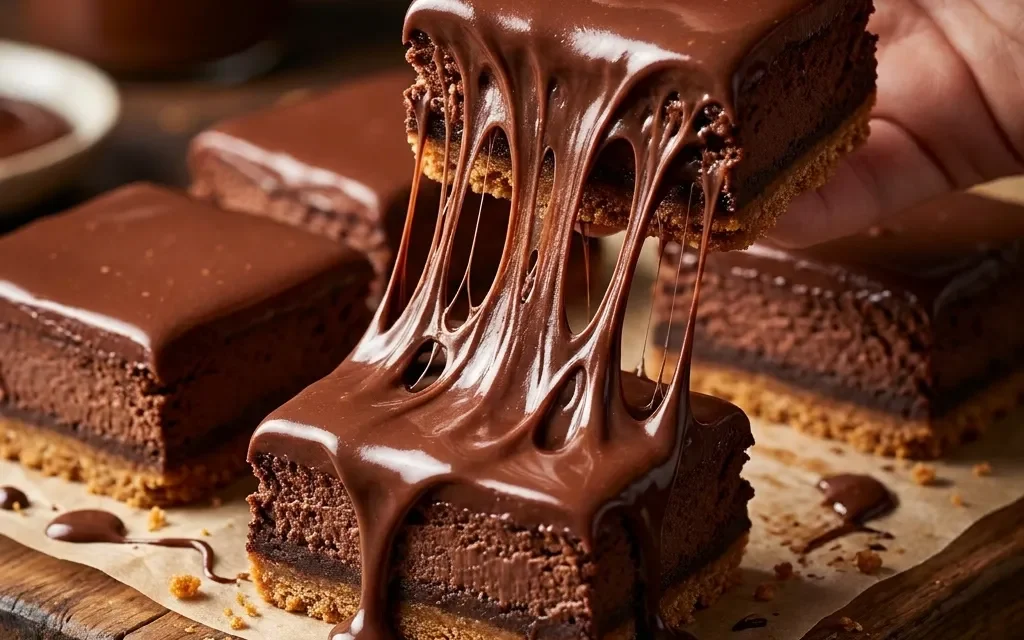
Growing up, chocolate was always the star of our dessert table, and my mom had a knack for turning the simplest ingredients into something magical. One of my fondest memories is the day she decided to surprise us with her famous Chocolate Cheesecake Bars. I remember walking into the kitchen, the warm scent of melted chocolate wafting through the air, and seeing the gleam of those decadent bars cooling on the counter. It was one of those moments where time seemed to stand still.
She called everyone to gather around, and as she cut those bars into squares, we could hardly wait to dig in. Each bite was a perfect balance of creamy cheesecake and rich chocolate, with that delightful graham cracker crust providing the right amount of crunch. I still remember the way my brother and I fought over the last piece, both claiming it was “just a little bit bigger.”
Now, years later, making Chocolate Cheesecake Bars has become a cherished tradition in my own home. They’re perfect for every occasion, from birthdays to holiday gatherings, and they never fail to impress family and friends alike. Plus, they’re super easy to whip up, taking just 15 minutes of prep time and 30 minutes in the oven. Honestly, there’s something about the combination of chocolate and cheesecake in bar form that feels like a hug in dessert form. If you haven’t tried making these yet, trust me, they’ll become your new favorite too!
Why This Chocolate Cheesecake Bars Recipe Will Become Your Go-To
The Secret Behind Perfect Chocolate Cheesecake Bars
What makes this Chocolate Cheesecake Bars recipe truly special is its simplicity combined with an explosion of flavor. The creamy texture of the cheesecake, paired with the rich, melted chocolate and the crumbly graham cracker crust, creates a perfect bite every time. Unlike traditional cheesecakes that require hours of baking and cooling, these bars can be made in just 45 minutes. The secret lies in using high-quality semi-sweet chocolate and letting your cream cheese soften to perfection. This ensures that your bars are not only delicious but also have a smooth consistency that melts in your mouth.
Additionally, the versatility of these bars means you can easily adapt them for different occasions or dietary preferences. Whether you’re making them for a cozy family gathering or a fancy dinner party, they never disappoint. Once you master this recipe, you’ll find yourself reaching for it time and time again.
Essential Ingredients You’ll Need
1 ½ cups graham cracker crumbs
The graham cracker crumbs form the base of your bars, providing a sweet and crunchy texture that perfectly balances the creamy cheesecake layer.
½ cup unsalted butter, melted
Melted unsalted butter binds the crumbs together, creating a rich crust that holds its shape while adding flavor. Make sure to use unsalted butter to control the saltiness of your dessert.
2 cups cream cheese, softened
Softened cream cheese is the star of the show, giving your bars that signature creamy texture. Ensure it’s at room temperature for easy mixing and a smooth end product.
1 cup powdered sugar
Powdered sugar sweetens the cheesecake filling without the graininess of granulated sugar, making it perfectly smooth and luscious.
1 cup semi-sweet chocolate chips, melted
Melted semi-sweet chocolate chips add depth and richness to your cheesecake filling, creating a delightful chocolate flavor that pairs beautifully with the cream cheese.
2 large eggs
Eggs help to set your cheesecake bars, giving them structure while adding moisture. Make sure they’re at room temperature to ensure even mixing.
1 teaspoon vanilla extract
Vanilla extract enhances the overall flavor of your Chocolate Cheesecake Bars, providing a warm and inviting aroma that complements the chocolate beautifully.
½ teaspoon salt
A pinch of salt enhances the sweetness of your bars, balancing the flavors and making each bite even more delicious.
Step-by-Step Chocolate Cheesecake Bars Instructions
Preparing Your Chocolate Cheesecake Bars
With just 15 minutes of prep time and 30 minutes of cooking, you can whip up these delightful Chocolate Cheesecake Bars in no time! To achieve the best results, you’ll need a mixing bowl, a baking pan, and an electric mixer. Let’s get started!
1- Begin by preheating your oven to 325°F (160°C). While the oven warms up, grab a mixing bowl and combine the graham cracker crumbs and melted unsalted butter. Stir until fully combined, and the mixture resembles wet sand. This will create the crust for your bars.
2- Next, press the crumb mixture evenly into the bottom of a greased 9×13-inch baking pan. Use the back of a measuring cup or your fingers to ensure it’s tightly packed. Bake for 10 minutes until slightly golden. You’ll know it’s ready when you can smell the warm, buttery aroma wafting through your kitchen.
3- While the crust bakes, prepare the cheesecake filling. In a large mixing bowl, add the softened cream cheese and powdered sugar. Using an electric mixer, beat until smooth and creamy, about 2-3 minutes. Make sure there are no lumps remaining, as this will ensure a velvety texture in your final bars.
4- Gradually add the melted semi-sweet chocolate chips, eggs, vanilla extract, and salt to the cream cheese mixture. Continue to mix until everything is well combined and smooth. The batter should be thick and glossy, with a rich chocolate hue that’s hard to resist.
5- Pour the cheesecake filling over the baked graham cracker crust, smoothing it out with a spatula. Bake in the preheated oven for an additional 20 minutes. You’ll know it’s done when the edges are set, and the center has a slight jiggle, indicating a creamy texture.
6- Once baked, remove the Chocolate Cheesecake Bars from the oven and let them cool in the pan for about 30 minutes. After they cool, transfer the pan to the refrigerator for at least 2 hours before slicing. This will help the bars set completely. When ready to serve, cut them into squares and enjoy!
Pro Tips for Success
To ensure your Chocolate Cheesecake Bars turn out perfectly, keep these tips in mind:
- Always use room temperature cream cheese for a smooth filling. Cold cream cheese can lead to lumps in your batter.
- Don’t overmix the filling once you add the eggs. Overmixing can incorporate too much air, leading to cracks during baking.
- Allow the bars to cool completely before refrigerating. This helps to set the cheesecake and makes cutting easier.
- Use a sharp knife to slice the bars for clean edges. Wipe the knife with a damp cloth between cuts for neat slices.
- For an extra touch, top your bars with whipped cream or chocolate shavings before serving.
Serving and Storing Your Chocolate Cheesecake Bars
Perfect Pairings for Chocolate Cheesecake Bars
These Chocolate Cheesecake Bars serve 16 servings, making them perfect for gatherings! Pair them with a dollop of freshly whipped cream or a scoop of vanilla ice cream for an indulgent dessert experience. They also go wonderfully with a cup of coffee or a glass of cold milk. If you’re feeling adventurous, serve them alongside fresh berries for a refreshing contrast to the rich chocolate. These bars are versatile enough for any occasion, from casual family dinners to elegant parties.
Storage and Make-Ahead Tips
If you have leftovers (though they’re hard to resist!), store your Chocolate Cheesecake Bars in an airtight container in the refrigerator for up to 5 days. For longer storage, these bars freeze beautifully. Wrap each piece in plastic wrap and then place them in a freezer-safe container for up to 2 months. To reheat, simply thaw them in the fridge overnight and enjoy them cold or let them sit at room temperature for about 30 minutes before serving.
Variations and Dietary Adaptations for Chocolate Cheesecake Bars
Creative Chocolate Cheesecake Bars Variations
Get creative with your Chocolate Cheesecake Bars by experimenting with different flavors! For a minty twist, add a teaspoon of peppermint extract to the filling and top with crushed candy canes during the holiday season. You can also try adding a layer of caramel sauce on top of the cheesecake before baking for a salted caramel version. If you’re a fan of nuts, fold in some chopped walnuts or pecans for added crunch. Lastly, consider using white chocolate chips instead of semi-sweet for a sweeter, creamier bar.
Making Chocolate Cheesecake Bars Diet-Friendly
If you’re looking to make these Chocolate Cheesecake Bars more diet-friendly, there are plenty of substitutions you can try. For a gluten-free version, use gluten-free graham crackers for the crust. To make them vegan, substitute the cream cheese with a plant-based alternative and replace the eggs with flax eggs (1 tablespoon ground flaxseed mixed with 2.5 tablespoons water per egg). For a low-carb option, opt for almond flour mixed with melted coconut oil for the crust and use a sugar substitute like erythritol in place of powdered sugar.
Frequently Asked Questions
Q: Can I use a different type of crust for the Chocolate Cheesecake Bars?
A: Absolutely! You can use crushed Oreos or even a nut-based crust for a gluten-free option. Just ensure the crust holds together well.
Q: How can I tell when the Chocolate Cheesecake Bars are done baking?
A: They are ready when the edges are set, and the center has a slight jiggle. This usually takes about 20 minutes after the crust has baked.
Q: Can I make these Chocolate Cheesecake Bars ahead of time?
A: Yes! You can prepare them up to 2 days in advance and store them in the refrigerator. They’ll taste even better after chilling!
Q: How do I serve the Chocolate Cheesecake Bars?
A: These bars serve 16 servings, so cut them into squares and serve on a platter. Feel free to garnish with whipped cream or chocolate drizzle!
Q: What if my Chocolate Cheesecake Bars crack?
A: Cracks can happen if the filling is overmixed or if they cool too quickly. To prevent this, avoid overmixing and let them cool gradually in the pan.
Conclusion
Chocolate Cheesecake Bars are not just a dessert; they’re a sweet memory waiting to happen. This recipe is straightforward, delicious, and sure to impress anyone who takes a bite! I encourage you to give it a try and share your thoughts in the comments. Your friends and family will thank you for introducing them to this delectable treat. Happy baking!