I can still remember the very first time I took a bite of a Chocolate Peanut Butter Bar. It was at a friend’s birthday party, and the table was overflowing with treats. I spotted these bars, drizzled in chocolate, and they looked like little squares of heaven. As I sank my teeth into one, the creamy peanut butter and sweet chocolate melded together in a way that made my taste buds dance. It was a revelation! I couldn’t believe how simple the ingredients were—just peanut butter, graham crackers, and chocolate—but the flavor was anything but basic.
From that moment on, I was hooked. I started experimenting in the kitchen, trying to recreate that perfect balance of sweet and salty. After a bit of trial and error, I finally landed on the recipe I’m sharing with you today. These Chocolate Peanut Butter Bars are not only easy to make, but they also come together in just 30 minutes! Perfect for satisfying a sweet tooth or impressing guests at a gathering, these bars have become a staple in my dessert rotation. Whether it’s a casual weeknight or a festive occasion, there’s something about the combination of chocolate and peanut butter that just feels right. So, let’s dive into this delicious recipe that’ll make you the star of any dessert table!
Why This Chocolate Peanut Butter Bars Recipe Will Become Your Go-To
The Secret Behind Perfect Chocolate Peanut Butter Bars
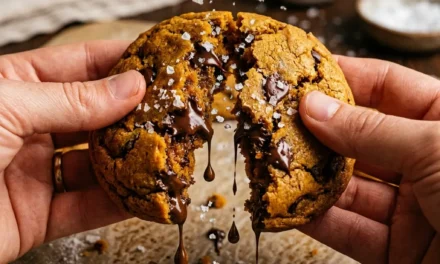
What makes this recipe for Chocolate Peanut Butter Bars truly special is its simplicity and the delightful texture contrast. The creamy peanut butter base is complemented by the crunch of crushed graham crackers, giving each bite a satisfying crunch. The melted chocolate topping adds a rich finish that’s both indulgent and comforting. Plus, these bars are no-bake, which means you won’t have to spend hours in the kitchen to create something extraordinary.
This recipe is also incredibly forgiving; you can tweak it to suit your preferences without losing the essence of what makes these bars so enjoyable. Whether you want to add a sprinkle of sea salt on top or swap out the chocolate for white chocolate, the possibilities are endless! You’ll find that these Chocolate Peanut Butter Bars are not just a dessert; they’re a canvas for your creativity.
Essential Ingredients You’ll Need
1 cup creamy peanut butter
Creamy peanut butter serves as the heart of these bars. Its smooth texture creates a luscious base that binds all the ingredients together while providing that unmistakable nutty flavor.
1 cup powdered sugar
Powdered sugar sweetens the bars and helps achieve that velvety consistency. It dissolves easily, ensuring a smooth blend with the peanut butter.
1 cup crushed graham crackers
The crushed graham crackers add crunch and a hint of sweetness, balancing the rich peanut butter and chocolate. They also provide structure to the bars, making them easy to slice and serve.
1/2 cup unsalted butter, melted
Melted unsalted butter enriches the flavor and contributes to the perfect texture. It helps the bars hold together while adding a delightful richness.
1 cup semi-sweet chocolate chips
Semi-sweet chocolate chips create the perfect topping for these bars. Their rich, sweet flavor contrasts beautifully with the peanut butter and balances the overall taste.
2 tablespoons coconut oil
Coconut oil is key to achieving a smooth, glossy chocolate layer. It helps the chocolate melt beautifully and adds a subtle hint of tropical flavor without overpowering the other ingredients.
Step-by-Step Chocolate Peanut Butter Bars Instructions
Preparing Your Chocolate Peanut Butter Bars
These Chocolate Peanut Butter Bars are incredibly quick to prepare, with a prep time of just 15 minutes and a cook time of 15 minutes, totaling a mere 30 minutes from start to finish! You’ll need an 8×8-inch baking dish, mixing bowls, a measuring cup, and a spatula. Let’s get started!
1- In a large mixing bowl, combine 1 cup of creamy peanut butter and 1 cup of powdered sugar. Use a spatula to mix until the two are fully incorporated and smooth. The mixture should be thick and slightly sticky, with no visible sugar granules remaining. This usually takes about 2-3 minutes.
2- Next, add 1 cup of crushed graham crackers and 1/2 cup of melted unsalted butter to the peanut butter mixture. Stir well until everything is evenly combined and the graham crackers are fully coated. You’ll know you’re done when the mixture holds together and starts to pull away from the sides of the bowl, which should take another 2-3 minutes.
3- Now, transfer the mixture into your prepared baking dish, pressing it down firmly with your hands or the back of a spatula to create an even layer. Make sure it’s packed tightly to prevent the bars from crumbling later. This step is crucial for achieving that perfect texture, so take your time. It should take around 5 minutes.
4- In a microwave-safe bowl, combine 1 cup of semi-sweet chocolate chips and 2 tablespoons of coconut oil. Microwave in 30-second intervals, stirring after each interval until the chocolate is fully melted and smooth. This should take about 1-2 minutes total. Look for a glossy appearance; if the chocolate is still thick, continue microwaving in short bursts.
5- Once melted, pour the chocolate mixture over the pressed peanut butter layer in the baking dish. Use a spatula to spread it evenly across the surface. When you’re done, the chocolate layer should be thick enough to cover the peanut butter layer completely, providing a luscious finish.
6- Finally, refrigerate the bars for at least 15 minutes, or until the chocolate is set. Once firm, remove the bars from the dish and cut them into 16 squares. Serve them chilled or at room temperature, and watch as your friends and family devour them!
Pro Tips for Success
To ensure your Chocolate Peanut Butter Bars turn out perfectly every time, here are some pro tips:
- Use room-temperature peanut butter for easier mixing; it blends more smoothly with powdered sugar.
- Press the graham cracker mixture firmly into the baking dish to avoid crumbling when cutting.
- Stir the chocolate thoroughly after each microwave interval to prevent burning.
- Let the bars chill long enough for the chocolate to set; this enhances the texture and makes them easier to cut.
- Feel free to experiment with toppings, such as chopped nuts or a drizzle of caramel for added flair.
Serving and Storing Your Chocolate Peanut Butter Bars
Perfect Pairings for Chocolate Peanut Butter Bars
These Chocolate Peanut Butter Bars serve 16, making them an excellent choice for gatherings or family movie nights. Pair them with a glass of cold milk for a classic combination, or serve them alongside a scoop of vanilla ice cream for an indulgent dessert. They also go wonderfully with a rich cup of coffee or a refreshing iced latte, enhancing the sweet, nutty flavors of the bars. If you’re hosting a party, consider serving them with fresh fruit like strawberries or banana slices for a delightful contrast.
Storage and Make-Ahead Tips
Storing your Chocolate Peanut Butter Bars is easy! Keep them in an airtight container in the refrigerator for up to a week. If you want to extend their shelf life, you can freeze them. Just wrap each bar in plastic wrap and place them in a freezer-safe container. They’ll stay fresh for up to three months. To enjoy, simply thaw in the refrigerator overnight or let them sit at room temperature for about 30 minutes before serving. Don’t worry; they’ll retain their delicious taste and texture!
Variations and Dietary Adaptations for Chocolate Peanut Butter Bars
Creative Chocolate Peanut Butter Bars Variations
Don’t hesitate to mix things up! Here are a few creative variations of Chocolate Peanut Butter Bars you might love:
- Crunchy Variation: Mix in crushed pretzels or toffee bits for added crunch and a salty-sweet twist.
- Nutty Bliss: Add chopped nuts like almonds or walnuts to the peanut butter layer for extra texture and flavor.
- Mint Chocolate: Incorporate a few drops of peppermint extract into the chocolate layer for a refreshing minty flavor.
- Seasonal Twist: During the fall, try adding a pinch of cinnamon to the peanut butter mixture for a warm, comforting flavor.
Making Chocolate Peanut Butter Bars Diet-Friendly
You can easily adapt this recipe for various dietary needs:
- Gluten-Free: Use gluten-free graham crackers to keep this recipe gluten-free while maintaining the same delicious taste.
- Vegan: Substitute the creamy peanut butter with a plant-based alternative and use vegan chocolate chips for a fully vegan version.
- Low-Carb: Replace powdered sugar with a low-carb sweetener, such as erythritol or monk fruit sweetener, for a keto-friendly treat.
- Nut-Free: Swap peanut butter for sunflower seed butter if you need a nut-free option; it still offers a creamy texture and delicious flavor.
Frequently Asked Questions
Q: Can I substitute the peanut butter with another nut butter?
A: Yes, you can use almond butter or sunflower seed butter as alternatives. Just keep in mind that the flavor and texture may vary slightly.
Q: How can I adjust the cooking time if I want to make a larger batch?
A: If you’re making a larger batch, increase the cooking time slightly, checking for the chocolate’s set texture. It should still be around 30 minutes total, but larger portions may need a few extra minutes.
Q: Can I make these bars ahead of time for a party?
A: Absolutely! You can prepare these Chocolate Peanut Butter Bars a day in advance and store them in the refrigerator. They’ll taste just as delicious the next day.
Q: How do I cut the bars without them falling apart?
A: For clean cuts, use a sharp knife and wipe it with a damp cloth between cuts. Chilling the bars long enough helps them maintain their shape.
Q: What should I do if my chocolate layer is too thick?
A: If your chocolate layer is too thick, you can reheat it gently in the microwave with a touch more coconut oil until it reaches your desired consistency.
Conclusion
These Chocolate Peanut Butter Bars are a delightful treat that’s sure to please everyone. With their rich flavors and satisfying texture, they’re perfect for any occasion. I encourage you to try making them yourself—you won’t regret it! Don’t forget to share your thoughts and any variations you come up with in the comments below. Happy baking!