
It was my grandmother’s 80th birthday, and the entire family had gathered at her cozy farmhouse for the celebration. As I walked through the door, the irresistible aroma of freshly baked Karpatka Cake filled the air, instantly transporting me back to my childhood. I can still picture my grandmother, her face beaming with pride, as she presented the towering cake, its layers of delicate pastry and rich cream glistening under the soft lighting.
That day, I watched in awe as my relatives devoured slice after slice, their eyes lighting up with each bite. It was in that moment that I knew Karpatka Cake was more than just a dessert – it was a cherished tradition, a symbol of our family’s heritage, and a testament to the love and care my grandmother poured into every recipe.
Why This Karpatka Cake Recipe Will Become Your Go-To
The Secret Behind Perfect Karpatka Cake
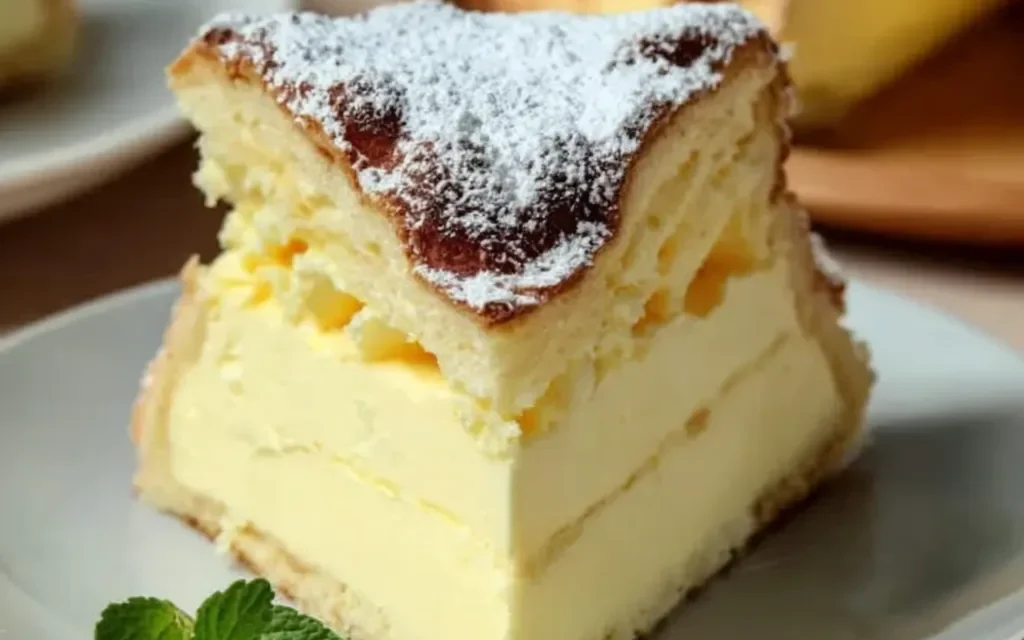
Over the years, I’ve perfected my grandmother’s Karpatka Cake recipe, and I’m excited to share it with you. This cake is not your average sponge cake – it’s a delightful combination of flaky, buttery pastry and a luscious, creamy filling that will have your taste buds dancing with delight. The secret lies in the technique. By carefully layering the pastry and cream, you’ll create a cake that’s both visually stunning and incredibly satisfying to eat.
Essential Ingredients You’ll Need
To make this Karpatka Cake, you’ll need a few key ingredients:
- 2 cups all-purpose flour: The foundation of the pastry, this flour gives the cake its structure and flakiness.
- 1 cup granulated sugar: This sweetener balances the richness of the other ingredients, creating a perfectly balanced flavor.
- 4 large eggs: The eggs are crucial for binding the pastry and adding a light, airy texture to the cake.
- 1 cup unsalted butter, softened: Butter is the star of the show, contributing to the cake’s melt-in-your-mouth texture and rich flavor.
- 1 teaspoon vanilla extract: A touch of vanilla enhances the overall taste, making the Karpatka Cake even more irresistible.
- 1/4 teaspoon salt: A small amount of salt helps to accentuate the sweetness and balance the flavors.
- 2 cups heavy cream: The luscious, creamy filling is the perfect complement to the flaky pastry.
- 1/4 cup powdered sugar: This light dusting of powdered sugar adds a beautiful finishing touch and a delicate sweetness.
Step-by-Step Karpatka Cake Instructions
Preparing Your Karpatka Cake
With a prep time of just 15 minutes and a cook time of 35 minutes, this Karpatka Cake recipe is a breeze to make. You’ll need a few basic kitchen tools, such as a mixing bowl, a hand mixer, and a springform pan, to create this delectable dessert.
1- Begin by preheating your oven to 350°F (175°C). In a large mixing bowl, combine the 2 cups of all-purpose flour, 1 cup of granulated sugar, and 1/4 teaspoon of salt. Using a hand mixer, blend the dry ingredients until they’re well combined.
2- Next, add 4 large eggs, one at a time, beating well after each addition. Then, incorporate the 1 cup of softened unsalted butter and 1 teaspoon of vanilla extract, mixing until the batter is smooth and creamy.
3- Grease a 9-inch springform pan and gently transfer the batter into the pan, spreading it evenly. Bake the cake for 35 minutes, or until a toothpick inserted into the center comes out clean.
4- While the cake is baking, prepare the creamy filling. In a separate bowl, whip 2 cups of heavy cream until stiff peaks form. Gently fold in 1/4 cup of powdered sugar.
5- Once the cake has cooled completely, carefully remove it from the springform pan. Using a serrated knife, slice the cake horizontally into 3 even layers.
6- Spread the whipped cream filling evenly between the cake layers, then stack them back together. Dust the top of the Karpatka Cake with a light coating of powdered sugar, and voila! Your masterpiece is ready to be served and enjoyed.
Pro Tips for Success
- Chill your mixing bowl and beaters before whipping the cream for best results.
- Gently fold the powdered sugar into the whipped cream to prevent it from becoming grainy.
- Use a serrated knife and a gentle sawing motion to slice the cake layers evenly.
- Refrigerate the assembled Karpatka Cake for at least 2 hours before serving to allow the layers to set.
- Consider dusting the top of the cake with a bit of unsweetened cocoa powder for a beautiful contrast.
Serving and Storing Your Karpatka Cake
Perfect Pairings for Karpatka Cake
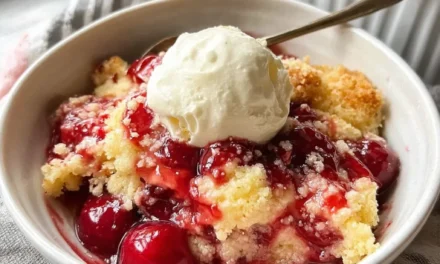
This Karpatka Cake recipe yields 12 servings, making it the perfect dessert for gatherings and celebrations. Serve it alongside a steaming cup of coffee or a glass of cold milk for a classic pairing. For a more indulgent experience, consider a scoop of vanilla ice cream or a drizzle of caramel sauce. Karpatka Cake also pairs beautifully with fresh berries, such as raspberries or blackberries, which add a refreshing contrast to the rich, creamy filling.
Storage and Make-Ahead Tips
Karpatka Cake is a dessert that can easily be made ahead of time, making it a great option for busy schedules. Once the cake has been assembled, simply cover it with plastic wrap or a cake dome and refrigerate for up to 5 days. If you’d like to freeze the Karpatka Cake, wrap it tightly in plastic wrap or aluminum foil and store it in the freezer for up to 3 months. When ready to serve, thaw the cake in the refrigerator overnight, then dust with powdered sugar just before serving.
Variations and Dietary Adaptations for Karpatka Cake
Creative Karpatka Cake Variations
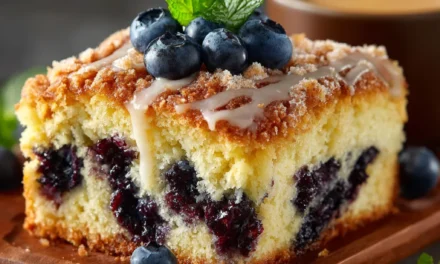
While the traditional Karpatka Cake is a true delight, there are plenty of ways to put a unique spin on this classic recipe. For a seasonal twist, try adding a layer of fresh fruit, such as sliced apples or pears, between the cake layers. You can also experiment with different flavors in the filling, such as using a touch of lemon zest or swirling in a spoonful of your favorite jam.
Making Karpatka Cake Diet-Friendly
If you’re looking to make Karpatka Cake a bit more diet-friendly, there are a few simple substitutions you can try. For a gluten-free version, use a 1-to-1 gluten-free flour blend in place of the all-purpose flour. To make it vegan, replace the butter with a plant-based alternative, such as coconut oil or vegan margarine, and use a non-dairy milk in the filling. For a low-carb take, swap the granulated sugar for a calorie-free sweetener and use a keto-friendly flour, such as almond or coconut flour.
Frequently Asked Questions
Q: Can I use a different type of flour besides all-purpose?
A: While all-purpose flour is the traditional choice for Karpatka Cake, you can experiment with other flours, such as pastry flour or cake flour, which will result in a slightly different texture.
Q: How can I ensure the cake layers are evenly baked?
A: To achieve evenly baked layers, be sure to spread the batter evenly in the pan before baking. You can also try rotating the pan halfway through the baking time to ensure even heat distribution.
Q: Can I make Karpatka Cake ahead of time?
A: Yes, Karpatka Cake can be made up to 5 days in advance. Simply assemble the cake, cover it, and refrigerate until ready to serve.
Q: How many servings does this recipe make?
A: This Karpatka Cake recipe yields 12 servings, making it a perfect dessert for gatherings and celebrations.
Q: What if the cake sticks to the pan?
A: To prevent the cake from sticking, be sure to thoroughly grease the springform pan before adding the batter. You can also try lining the bottom of the pan with parchment paper for extra insurance.

Karpatka Cake
- Total Time: 50
- Yield: 12 servings
Description
Indulge in the delightful flavors of Karpatka Cake, a classic Polish dessert with a flaky, golden crust and a rich, creamy interior. This easy-to-make recipe will satisfy your sweet tooth and transport you to the heart of Polish baking tradition.
Ingredients
– 2 cups all-purpose flour
– 1 cup granulated sugar
– 4 large eggs
– 1 cup unsalted butter, softened
– 1 teaspoon vanilla extract
– 1/4 teaspoon salt
– 2 cups heavy cream
– 1/4 cup powdered sugar
Instructions
1. Preheat your oven to 350°F (175°C). Grease a 9×13-inch baking pan and set aside.
2. In a large mixing bowl, combine the all-purpose flour, granulated sugar, and salt. Add the softened butter and use a fork or your fingers to mix until the mixture resembles coarse crumbs.
3. Separate the egg yolks and whites into two different bowls. Add the egg yolks to the flour mixture and stir until a dough forms.
4. In a separate bowl, beat the egg whites with an electric mixer until stiff peaks form.
5. Gently fold the whipped egg whites into the dough mixture until well combined.
6. Press half of the dough into the prepared baking pan, creating an even layer.
7. In a separate bowl, whip the heavy cream with the powdered sugar until it forms stiff peaks.
8. Spread the whipped cream over the dough layer in the pan.
9. Crumble the remaining dough over the top of the cream layer, creating an even, crumbly topping.
10. Bake the Karpatka Cake in the preheated oven for 30-35 minutes, or until the top is golden brown.
11. Allow the cake to cool completely before cutting and serving.
Notes
For a variation, you can add a layer of your favorite fruit preserves or jam between the cream and crumbled dough layers. The Karpatka Cake can be stored in the refrigerator for up to 4 days.
- Prep Time: 15
- Cook Time: 35
- Category: Cakes & No-Bake Sweets
- Method: Baking
- Cuisine: Polish
Conclusion
Karpatka Cake is a true masterpiece of baking, with its flaky pastry and luscious cream filling. This recipe has been a cherished family tradition for generations, and I’m thrilled to share it with you. Whether you’re baking for a special occasion or simply treating yourself to a delectable dessert, I’m confident this Karpatka Cake will become your new go-to. So preheat your oven, gather your ingredients, and get ready to create a dessert that will have your loved ones raving. I can’t wait to hear how your Karpatka Cake turns out – be sure to share your photos and thoughts in the comments below!

