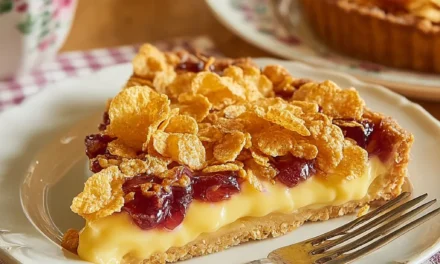
I still remember the first time I made Mini Berry Galettes. It was a sunny afternoon, and the air was filled with the sweet aroma of summer. My kids were playing outside, and I thought, why not whip up a little treat for them? I had some fresh berries in the fridge, leftovers from our recent trip to the farmers’ market. The idea of making Mini Berry Galettes popped into my head, and I couldn’t resist.
As I rolled out the pie crust, my kids peeked into the kitchen, intrigued by the sounds of dough and the vibrant colors of the berries. They loved helping me mix the berries with sugar and lemon juice, and their excitement was contagious. The best part was watching them eagerly wait for the Mini Berry Galettes to bake, their little noses pressed against the oven door, eyes wide with anticipation.
When they finally came out, golden brown and slightly bubbling, we dusted them with powdered sugar and served them warm. The first bite was pure bliss—the flaky crust, the sweet and tangy filling, and that fresh burst of berry flavor was everything I hoped for. It became a cherished recipe in our family, one that I often make on weekends or special occasions. Now, every time I make Mini Berry Galettes, it brings back those joyful memories, and I can’t help but smile. These delightful treats are so easy to prepare and perfect for sharing, making them an instant favorite!
Why This Mini Berry Galettes Recipe Will Become Your Go-To
The Secret Behind Perfect Mini Berry Galettes
What makes this Mini Berry Galettes recipe truly special is its simplicity and the way it captures the essence of summer in every bite. The flaky crust pairs beautifully with a vibrant mix of berries, creating a delightful contrast of textures. Using a pre-made pie crust means you can whip these up in no time, making them perfect for spontaneous gatherings or an impromptu dessert. The combination of sugar, cornstarch, and lemon juice enhances the natural sweetness of the berries while maintaining their integrity, resulting in a filling that’s both luscious and vibrant.
Additionally, these galettes are incredibly versatile. You can swap in whatever berries are in season or even add a touch of vanilla or almond extract for an extra flavor twist. This recipe allows for creativity while keeping the preparation straightforward. Whether you’re baking for a family gathering or just a cozy night at home, these Mini Berry Galettes will surely impress.
Essential Ingredients You’ll Need
To make Mini Berry Galettes, you’ll need the following ingredients, each playing a crucial role in the flavor and texture of this delightful dessert:
1 cup mixed berries (strawberries, blueberries, raspberries)
Fresh, vibrant berries are the star of this recipe. Their natural sweetness and juiciness provide the perfect filling for the galettes. You can use any mix of berries you like or even substitute with seasonal fruits for a twist.
1 tablespoon sugar
Sugar not only sweetens the berries but also helps to create a delicious caramelization during baking. It balances the tartness of the berries, making every bite a perfect blend of flavors.
1 teaspoon cornstarch
Cornstarch acts as a thickening agent, ensuring that the berry juices don’t make the crust soggy. It helps maintain a nice, firm filling while allowing the flavors to meld beautifully.
1 teaspoon lemon juice
A splash of lemon juice brightens the flavors of the berries, enhancing their natural taste. It adds a refreshing tang that contrasts wonderfully with the sweetness.
1 pre-made pie crust (store-bought or homemade)
Using a pre-made pie crust saves time without sacrificing quality. It provides a flaky, buttery base that complements the filling perfectly. If you prefer, you could also make your own crust for a more personalized touch.
1 egg (for egg wash)
Brushing the crust with egg wash gives it a beautiful, golden color and a shiny finish. It adds to the visual appeal of the galettes, making them even more irresistible.
1 tablespoon butter (for topping)
A small pat of butter on top of each galette during baking adds richness and enhances the flavor profile. It helps to create that golden, crispy texture we all love.
Powdered sugar (for dusting, optional)
A light dusting of powdered sugar before serving adds a touch of elegance and sweetness, making these Mini Berry Galettes look and taste even more delightful.
Step-by-Step Mini Berry Galettes Instructions
Preparing Your Mini Berry Galettes
This Mini Berry Galettes recipe is as simple as it is delicious. With a prep time of just 15 minutes and a cook time of 30 minutes, you’ll have a total time of 45 minutes before you can enjoy these scrumptious treats. You’ll need a baking sheet, parchment paper, and an oven preheated to 375°F (190°C) to get started.
1- Begin by preheating your oven to 375°F (190°C) and line a baking sheet with parchment paper. While the oven warms up, take your pre-made pie crust out of the fridge, allowing it to come to room temperature. This will make it easier to roll out.
2- In a mixing bowl, combine the cup of mixed berries with the tablespoon of sugar, teaspoon of cornstarch, and teaspoon of lemon juice. Gently toss the berries so they’re evenly coated. The sugar will start to draw out the juices while the cornstarch helps thicken it. Let the mixture sit for about 10 minutes while you roll out the dough.
3- Roll out your pie crust on a lightly floured surface to about 1/8-inch thickness. Use a sharp knife or a pizza cutter to cut the dough into four equal circles, roughly 5-6 inches in diameter. If the edges aren’t perfect, don’t worry—rustic is the charm of galettes!
4- Spoon the berry mixture into the center of each dough circle, leaving about an inch of border. Gently fold the edges of the dough over the filling, pleating it as you go to create a rustic look. The galettes should look beautiful, with the filling peeking through the center.
5- Brush the exposed crust with the beaten egg for an egg wash, which will give the galettes a lovely golden color as they bake. Dot each galette with a small piece of butter on top for added richness.
6- Bake the galettes in your preheated oven for 25-30 minutes, or until the crust is golden brown and the filling is bubbling. Once done, remove them from the oven and let them cool for a few minutes before serving. Dust with powdered sugar for a beautiful finish, and serve warm for the best experience.
Pro Tips for Success
To ensure your Mini Berry Galettes turn out perfectly every time, keep these pro tips in mind:
- Use cold ingredients: If you’re making your own pie crust, ensure your butter and water are cold. This helps create a flaky texture in the crust.
- Don’t overfill: While it’s tempting to pile on the berry filling, overfilling can lead to a messy bake. Stick to the recommended amount for best results.
- Allow the filling to rest: Letting the berry mixture sit for a few minutes before filling the galettes helps to draw out the juices, ensuring the filling is perfectly sweet and balanced.
- Keep an eye on the baking time: Ovens can vary, so start checking your galettes a few minutes before the timer goes off. You want a golden crust and bubbling filling, but not burnt!
- Serve warm: These galettes are best enjoyed fresh out of the oven. If serving later, simply reheat them in the oven for a few minutes to revive that fresh-baked texture.
Serving and Storing Your Mini Berry Galettes
Perfect Pairings for Mini Berry Galettes
These Mini Berry Galettes serve 4 and are perfect for any occasion! They make an excellent dessert for a summer barbecue, a charming brunch item, or a delightful after-dinner treat. Pair them with a scoop of vanilla ice cream or a dollop of whipped cream for added indulgence. For a refreshing beverage, serve with iced tea or a light white wine, which complements the sweetness of the berries beautifully.
If you’re feeling adventurous, consider pairing them with a fresh fruit salad or a cheese platter featuring creamy brie or tangy goat cheese. The combination of sweet and savory will elevate your dessert experience to new heights.
Storage and Make-Ahead Tips
If you find yourself with leftover galettes (though that’s rare!), storing them is simple. Place them in an airtight container in the refrigerator, where they’ll keep for up to 3 days. When you’re ready to enjoy them again, simply reheat them in a 350°F (175°C) oven for about 10 minutes to restore their crispness.
For meal prep, you can prepare the berry filling a day in advance and keep it in the fridge. This way, you can whip up fresh Mini Berry Galettes in no time during a busy week. You can also freeze the assembled, uncooked galettes. Wrap them tightly in plastic wrap and freeze for up to a month. When you’re ready to bake, just pop them straight from the freezer into the oven, adding a few extra minutes to the baking time.
Variations and Dietary Adaptations for Mini Berry Galettes
Creative Mini Berry Galettes Variations
The beauty of Mini Berry Galettes lies in their versatility. Here are a few creative variations to try:
- Peach and Blueberry Galettes: Swap out the mixed berries for sliced peaches and blueberries for a sweet and juicy combination.
- Apple Cinnamon Galettes: Use thinly sliced apples, a sprinkle of cinnamon, and a touch of brown sugar for a cozy fall-inspired treat.
- Mixed Summer Fruits: Combine whatever fruits are in season, like cherries, blackberries, and apricots, for a vibrant, colorful filling.
- Chocolate Hazelnut Galettes: Spread a thin layer of chocolate hazelnut spread on the crust before adding a handful of sliced bananas or strawberries for a decadent dessert.
Making Mini Berry Galettes Diet-Friendly
Adapting Mini Berry Galettes for dietary restrictions is easier than you might think! Here are some specific ingredient swaps:
- Gluten-Free: Use a gluten-free pie crust or make your own using almond flour and coconut oil. This way, you can enjoy the same delicious flavors without gluten.
- Vegan: Replace the egg wash with a plant-based milk like almond or oat milk for brushing the crust. You can also use flaxseed meal mixed with water as an egg substitute for binding.
- Low-Carb: For a low-carb option, try using a cauliflower or almond flour crust. This will keep the carb count down while still giving you a delightful dessert.
- Sugar-Free: Substitute the sugar with your favorite sugar alternative, like stevia or erythritol, perfect for a low-calorie treat.
Frequently Asked Questions
Q: Can I substitute the berries?
A: Absolutely! You can use any combination of berries you enjoy, such as blackberries, strawberries, or even stone fruits like peaches or plums. Just keep the same quantity for the best results.
Q: How long does it take to make these Mini Berry Galettes?
A: The total time for making these Mini Berry Galettes is 45 minutes, which includes 15 minutes of prep time and 30 minutes of cook time. Perfect for a quick yet impressive dessert!
Q: Can I make these ahead of time?
A: Yes! You can prepare the filling a day in advance and store it in the fridge. The assembled galettes can also be frozen unbaked for up to a month, making them a great make-ahead option.
Q: What is the serving size for this recipe?
A: This recipe yields 4 servings, making it perfect for sharing with family or friends. You can easily double the recipe for larger gatherings!
Q: What if my galettes come out soggy?
A: If your galettes turn out soggy, this could be due to overfilling or not using enough cornstarch. Make sure to follow the filling measurements closely and let the berry mixture sit to thicken before filling the crust.
Conclusion
These Mini Berry Galettes are a delightful treat that’s sure to become a staple in your dessert repertoire. Their rustic charm, combined with the vibrant burst of mixed berries, makes them irresistible. Whether you’re baking for a special occasion or just want to indulge yourself, this recipe is perfect. I encourage you to try making these Mini Berry Galettes and share your thoughts in the comments below. Happy baking, and enjoy every delicious bite!