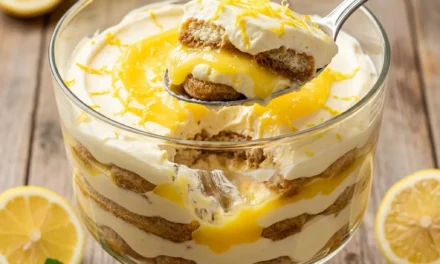
I remember the first time I made Mini Cheesecake Jars. It was a rainy Saturday afternoon, and I was looking for a fun way to spend some time in the kitchen. My friends were coming over for movie night, and I wanted to impress them with something sweet but not overly complicated. That’s when I stumbled upon the idea of Mini Cheesecake Jars. It just sounded delightful and perfect for sharing!
As I gathered my ingredients, I could already envision the creamy layers of cheesecake nestled in cute little jars. I loved how these Mini Cheesecake Jars could be made ahead of time and served right from the fridge, making them a stress-free dessert option. I decided to go classic with a graham cracker crust and rich cheesecake filling, topped with fresh berries for that extra pop of color.
As I mixed the cream cheese and sugar, the rich aroma filled the kitchen, and I could hardly wait to taste them. After layering the crust and filling, I let them chill in the fridge. By the time my friends arrived, the jars were ready, and I felt like a dessert rock star! The best part? Everyone loved them! They were the perfect individual servings—no need to slice a cake or worry about leftovers. That night, those Mini Cheesecake Jars were the star of the show, and I’ve been making them ever since.
Now, every time I whip up a batch, it brings me back to that cozy, rainy day, and I can’t help but feel a sense of joy and nostalgia. If you’re looking for a simple yet elegant dessert that’s sure to impress, you’ve got to try these Mini Cheesecake Jars. Trust me, they’ll steal the spotlight at your next gathering!
Why This Mini Cheesecake Jars Recipe Will Become Your Go-To
The Secret Behind Perfect Mini Cheesecake Jars
This Mini Cheesecake Jars recipe is special for several reasons. First, the no-bake aspect means you won’t be stuck in the kitchen for hours, and you can whip these up in just 15 minutes! The creamy texture of the cheesecake filling, combined with the crunchy graham cracker crust, creates an irresistible contrast that will have your taste buds dancing.
What sets this recipe apart is the use of heavy whipping cream, which adds an airy lightness to the cheesecake. This isn’t just any ordinary cheesecake—you’ll achieve a velvety smooth filling that’s rich but not overwhelmingly heavy. Plus, the jars give you the freedom to get creative with toppings. Fresh berries not only add a burst of color but also a refreshing tartness that balances the sweetness. You can customize each jar, making them perfect for any occasion. Whether it’s a summer picnic or a cozy winter gathering, these Mini Cheesecake Jars are sure to become your go-to dessert.
Essential Ingredients You’ll Need
To create these delightful Mini Cheesecake Jars, you’ll need the following ingredients:
8 oz cream cheese, softened
Cream cheese is the star of the filling. It provides that classic cheesecake flavor and creamy texture we all love. Make sure it’s softened to room temperature for easy mixing.
1 cup heavy whipping cream
This ingredient is key to achieving a light and fluffy texture. Whipping cream adds volume and richness to the cheesecake, making it decadently delicious.
1/2 cup powdered sugar
Powdered sugar dissolves easily, ensuring a smooth filling without any graininess. It sweetens the cheesecake perfectly, creating a delightful balance with the tangy cream cheese.
1 tsp vanilla extract
Vanilla extract enhances the overall flavor of the cheesecake. It adds warmth and depth, making each bite a delightful experience.
1 cup graham cracker crumbs
These crumbs form the base of your cheesecake jars. They provide a crunchy texture and a sweet, buttery flavor that complements the creamy filling beautifully.
1/4 cup unsalted butter, melted
Melted butter helps bind the graham cracker crumbs together, creating a firm crust that holds up well in the jars. Unsalted butter allows you to control the overall saltiness of the dessert.
Fresh berries for topping (optional)
Fresh berries add a pop of color and a burst of flavor. They’re optional, but I highly recommend them for that extra touch of freshness and tartness.
Step-by-Step Mini Cheesecake Jars Instructions
Preparing Your Mini Cheesecake Jars
Making Mini Cheesecake Jars is straightforward and fun! With a prep time of just 15 minutes and no cooking time, the total time for your delicious dessert is only 120 minutes, mostly for chilling. You’ll need some small jars, a mixing bowl, and a hand mixer or stand mixer to make this process smooth and easy.
1- Start by preparing the crust. In a mixing bowl, combine the graham cracker crumbs and melted butter. Mix until all the crumbs are evenly coated and resemble wet sand. This is important for achieving a firm crust that won’t crumble when you dig in.
2- Next, take small jars and spoon about 2-3 tablespoons of the crust mixture into the bottom of each jar. Press the crumbs down firmly with the back of a spoon to create an even layer. You want this layer to be compact and sturdy, so it holds up against the creamy filling.
3- In another bowl, beat the softened cream cheese and powdered sugar together using a hand mixer. Mix until smooth and creamy, about 2-3 minutes. Make sure to scrape down the sides of the bowl to incorporate everything well. The mixture should be lump-free and have a soft, spreadable consistency.
4- In a separate bowl, whip the heavy cream until stiff peaks form. This step is crucial as it adds airiness to the filling. As you whip, you’ll see the cream turn into soft peaks, and when it’s ready, it’ll hold its shape when you lift the whisk.
5- Gently fold the whipped cream into the cream cheese mixture using a spatula. This is where you want to be careful not to deflate the whipped cream. The mixture should be light and airy with a beautiful creamy texture that’s just begging to be spooned into the jars.
6- Now, spoon the cheesecake filling into each jar over the crust, filling them about 3/4 full. Smooth the top with a spatula for an even finish. If you’re adding fresh berries, this is the time to place them on top for a stunning presentation. Cover the jars with lids or plastic wrap and refrigerate for at least 2 hours to allow the flavors to meld and the cheesecake to firm up.
Pro Tips for Success
To make your Mini Cheesecake Jars turn out perfectly, keep these expert tips in mind:
- Use room temperature cream cheese. Cold cream cheese will result in a lumpy filling, so make sure it’s softened before mixing.
- Be gentle when folding in the whipped cream. This preserves the airiness of the mixture, which is crucial for a light texture.
- Don’t skip the chilling time! The cheesecake needs these 2 hours to set properly, ensuring the layers hold together when you serve them.
- Customize your toppings! While fresh berries are a great option, consider adding chocolate shavings, crushed nuts, or a drizzle of caramel for a unique twist.
- If you want a firmer crust, you can bake the crust at 350°F for 5-10 minutes before adding the filling. Just let it cool completely before assembling.
Serving and Storing Your Mini Cheesecake Jars
Perfect Pairings for Mini Cheesecake Jars
These Mini Cheesecake Jars serve 4 servings, making them perfect for a small gathering or a cozy night in. Pair them with a cup of coffee or a glass of sweet dessert wine for an elegant finish to your meal.
For a fun twist, serve them alongside a platter of fresh fruit like strawberries, raspberries, or a refreshing fruit salad. If you’re feeling adventurous, consider pairing them with a slice of chocolate cake or a scoop of vanilla ice cream for an indulgent dessert experience.
Storage and Make-Ahead Tips
If you want to prepare these Mini Cheesecake Jars ahead of time, you can store them in the refrigerator for up to 3 days. Just make sure they’re covered to avoid absorbing any odors from the fridge.
For longer storage, you can freeze them! Just be sure to cover the jars tightly with plastic wrap or transfer the filling into freezer-safe containers. They can be stored in the freezer for up to 2 months. When you’re ready to enjoy them, simply transfer them to the fridge to thaw overnight. They’ll taste just as delightful as when you first made them!
Variations and Dietary Adaptations for Mini Cheesecake Jars
Creative Mini Cheesecake Jars Variations
The beauty of Mini Cheesecake Jars is their versatility. Here are some fun variations you can try:
- Chocolate Mini Cheesecake Jars: Add melted chocolate to the cream cheese mixture for a rich chocolate flavor. Top with chocolate shavings for an extra decadent touch.
- Pumpkin Spice Mini Cheesecake Jars: Mix in pumpkin puree and pumpkin spice for a seasonal twist. These are perfect for fall gatherings!
- Lemon Mini Cheesecake Jars: Incorporate fresh lemon juice and zest into the filling for a bright and zesty flavor. Top with candied lemon peel for a beautiful garnish.
- Peanut Butter Mini Cheesecake Jars: Swirl in creamy peanut butter for a nutty flavor that pairs beautifully with the cheesecake. Top with crushed peanuts for added crunch.
Making Mini Cheesecake Jars Diet-Friendly
If you’re looking to adapt this recipe for dietary needs, here are some substitutions to consider:
- Gluten-Free: Use gluten-free graham crackers or crushed nuts as the base for the crust. Ensure all other ingredients are certified gluten-free.
- Vegan: Substitute the cream cheese with a plant-based cream cheese alternative and use coconut cream instead of heavy cream. For sweetening, opt for maple syrup or agave nectar.
- Low-Carb: Replace graham cracker crumbs with almond flour or crushed pecans for a low-carb crust. Use a sugar substitute like erythritol in place of powdered sugar for the filling.
Frequently Asked Questions
Q: Can I substitute the cream cheese with something else?
A: Yes, you can use a plant-based cream cheese alternative for a dairy-free option. Just ensure it’s softened for easy mixing.
Q: How long does it take for these Mini Cheesecake Jars to set?
A: The total time, including chilling, is 120 minutes. It’s best to refrigerate them for at least 2 hours to firm up before serving.
Q: Can I make these Mini Cheesecake Jars in advance?
A: Absolutely! You can prepare them up to 3 days in advance and store them in the refrigerator. For longer storage, freeze them for up to 2 months.
Q: What if I want to make more than 4 servings?
A: You can easily double or triple the recipe. Just ensure you have enough jars for the filling, and adjust the ingredient quantities accordingly.
Q: What should I do if my filling is too runny?
A: If your filling is too runny, it may not have been whipped enough. Make sure to whip the heavy cream until stiff peaks form, and fold it gently into the cream cheese mixture.
Conclusion
There you have it! These Mini Cheesecake Jars are not only incredibly easy to make, but they also deliver a deliciously creamy experience that everyone will love. I encourage you to give this recipe a try—you won’t be disappointed! Each jar is a little taste of heaven, perfect for any occasion.
I’d love to hear how your Mini Cheesecake Jars turn out, so feel free to leave a comment below or share your creations. Happy baking, and enjoy your delightful dessert!