
Oh my goodness, you’re not going to believe this, but I have the most delightful story about Reese’s Peanut Butter Earthquake Cake to share! It all started a few years ago when I was hosting a big family gathering at my place. I wanted to make something really special for dessert, and when I stumbled across this Reese’s Peanut Butter Earthquake Cake recipe, I just knew it was going to be a showstopper. I’ll never forget the look on everyone’s faces when I brought that decadent, peanut butter-infused masterpiece out of the kitchen. Jaws dropped, eyes went wide, and let me tell you, not a single slice was left by the end of the night. It was an absolute hit, and from that day on, Reese’s Peanut Butter Earthquake Cake has become my go-to recipe for any occasion where I want to really wow a crowd.
Why This Reese’s Peanut Butter Earthquake Cake Recipe Will Become Your Go-To
The Secret Behind Perfect Reese’s Peanut Butter Earthquake Cake
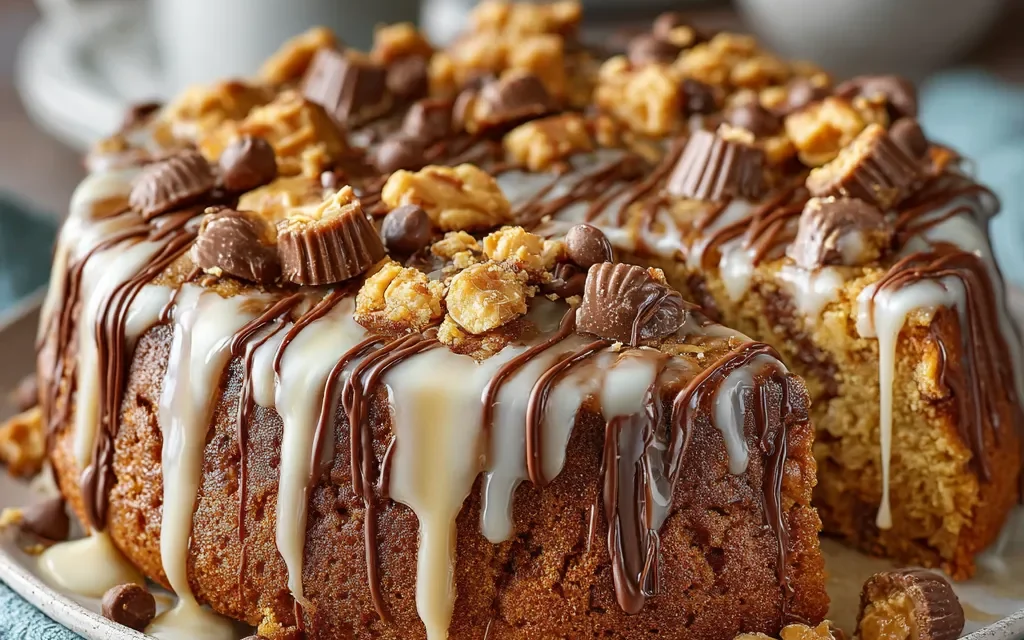
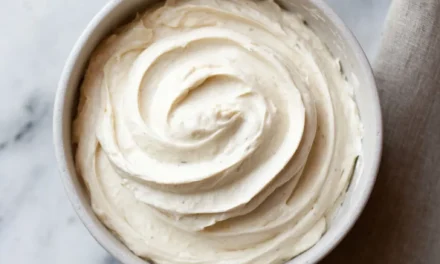
What makes this Reese’s Peanut Butter Earthquake Cake recipe so special is the perfect balance of rich, fudgy chocolate and creamy, peanut butter goodness. The cake itself is incredibly moist and tender, thanks to a unique technique that involves layering the batter with dollops of peanut butter before baking. As it cooks, the peanut butter literally “earthquakes” through the cake, creating those amazing pockets of peanut butter flavor in every bite. And the frosting? Oh, it’s to die for – a luscious, peanut butter-infused buttercream that complements the cake perfectly. Trust me, once you try this recipe, you’ll be hooked.
Essential Ingredients You’ll Need
- Flour – The base of the cake, providing structure and texture.
- Sugar – Sweetens the cake and helps create that perfect crumb.
- Cocoa powder – Gives the cake its rich, chocolatey flavor.
- Baking powder and baking soda – Leavening agents that make the cake rise and get that delightfully light and airy texture.
- Salt – Enhances all the other flavors.
- Eggs – Bind the cake batter together.
- Vegetable oil – Keeps the cake moist and tender.
- Milk – Adds moisture and helps the cake bake up beautifully.
- Creamy peanut butter – The star of the show, creating those signature pockets of peanut butter flavor.
- Unsalted butter – The base for the decadent peanut butter frosting.
- Powdered sugar – Sweetens and thickens the frosting.
Step-by-Step Reese’s Peanut Butter Earthquake Cake Instructions
Preparing Your Reese’s Peanut Butter Earthquake Cake
This Reese’s Peanut Butter Earthquake Cake comes together quickly and easily, with a total prep and baking time of just about an hour. You’ll need a few basic baking tools, like a mixing bowl, hand mixer, and a 9×13 inch baking pan. Let’s get started!
1- Preheat your oven to 350°F and grease the baking pan with nonstick cooking spray.
2- In a large mixing bowl, whisk together the dry ingredients – the flour, sugar, cocoa powder, baking powder, baking soda, and salt.
3- In a separate bowl, beat the eggs, then stir in the vegetable oil and milk until well combined.
4- Gradually add the wet ingredients to the dry ingredients, mixing just until no dry pockets remain. Be careful not to overmix.
5- Dollop spoonfuls of the creamy peanut butter all over the top of the batter, then use a knife to swirl it through, creating those signature “earthquake” effects.
6- Bake for 30-35 minutes, until a toothpick inserted in the center comes out clean. Allow the cake to cool completely before frosting.
Pro Tips for Success
The key to perfect Reese’s Peanut Butter Earthquake Cake is to not overmix the batter and to be gentle when swirling in the peanut butter. Overmixing can result in a tough, dense cake, and if you stir the peanut butter in too vigorously, you’ll lose those beautiful pockets of flavor. Also, be sure to use a high-quality, creamy peanut butter for the best results. Avoid the crunchy kind, as it can affect the texture. And don’t be afraid to get creative with mix-ins like chopped peanuts or chocolate chips!
Serving and Storing Your Reese’s Peanut Butter Earthquake Cake
Perfect Pairings for Reese’s Peanut Butter Earthquake Cake
Reese’s Peanut Butter Earthquake Cake is the ultimate indulgent dessert, so it pairs beautifully with a scoop of vanilla ice cream or a dollop of freshly whipped cream. For a more casual setting, it’s also delicious with a hot cup of coffee or a cold glass of milk. And let’s not forget the crowd-pleasing factor – this cake is guaranteed to be the star of any potluck, birthday party, or holiday gathering.
Storage and Make-Ahead Tips
Reese’s Peanut Butter Earthquake Cake will keep for up to 5 days when stored in an airtight container at room temperature. For longer storage, you can refrigerate the cake, which will extend its freshness for up to a week. To make it ahead of time, simply bake the cake, let it cool completely, and then wrap it tightly in plastic wrap. It can be stored in the fridge for up to 3 days before frosting and serving. And don’t worry, the peanut butter-infused cake stays wonderfully moist and delicious, even after being chilled.
Variations and Dietary Adaptations for Reese’s Peanut Butter Earthquake Cake
Creative Reese’s Peanut Butter Earthquake Cake Variations
While the classic Reese’s Peanut Butter Earthquake Cake is pure perfection, there are so many ways to put your own spin on it. Try adding chopped Reese’s Peanut Butter Cups to the batter for an extra burst of peanut butter flavor. Or swap out the peanut butter for Nutella for a chocolatey-hazelnut twist. You could even experiment with different mix-ins like crushed Oreos, chopped nuts, or swirls of caramel. The possibilities are endless!
Making Reese’s Peanut Butter Earthquake Cake Diet-Friendly
For those following a gluten-free diet, you can easily adapt this recipe by using a gluten-free all-purpose flour blend in place of the regular flour. And if you’re looking for a vegan version, you can substitute the eggs with flax or chia eggs, use plant-based milk, and swap the butter in the frosting for a dairy-free alternative like coconut oil or vegan butter. Just keep in mind that the texture and flavor may vary slightly with these substitutions.
Frequently Asked Questions
Q: Can I use crunchy peanut butter instead of creamy?
A: While you can use crunchy peanut butter, I’d recommend sticking with the creamy variety for the best texture and flavor in this Reese’s Peanut Butter Earthquake Cake. The crunchy peanut butter can affect the cake’s overall structure and cause the “earthquake” effect to be less pronounced.
Q: How do I know when the cake is done baking?
A: The cake is done when a toothpick inserted into the center comes out clean. You’ll also notice the top will be set and the edges will be slightly pulling away from the pan. Be careful not to overbake, as that can dry out the cake.
Q: Can I make this cake ahead of time?
A: Absolutely! Reese’s Peanut Butter Earthquake Cake can be made up to 3 days in advance. Just bake the cake, let it cool completely, and then wrap it tightly in plastic wrap before refrigerating. When you’re ready to serve, simply frost the chilled cake.
Q: How do I store leftovers?
A: Store any leftover Reese’s Peanut Butter Earthquake Cake in an airtight container at room temperature for up to 5 days. For longer storage, you can refrigerate the cake, which will keep it fresh for up to a week.
Q: What if the peanut butter sinks to the bottom during baking?
A: If you find that the peanut butter sinks to the bottom of the cake during baking, don’t worry! This is a common occurrence and doesn’t affect the overall taste or texture. Simply flip the cake over when it’s done baking, and the “earthquake” effect will still be visible on top.

Reese’s Peanut Butter Earthquake Cake
- Total Time: 45
- Yield: 12
Description
Reese’s Peanut Butter Earthquake Cake is a decadent and irresistible dessert that combines rich chocolate cake with a swirling peanut butter center. This no-fail recipe delivers a moist, fudgy texture and an unforgettable flavor that’s sure to satisfy any sweet tooth.
Ingredients
– 1 box chocolate cake mix
– 1 cup milk
– 1/2 cup vegetable oil
– 3 eggs
– 1 cup creamy peanut butter
– 1 cup chopped Reese’s peanut butter cups (optional)
Instructions
1. – Preheat oven to 350°F. Grease a 9×13 inch baking pan.
2. – In a large bowl, combine the cake mix, milk, vegetable oil, and eggs. Mix until well blended.
3. – Pour half the cake batter into the prepared pan.
4. – Dollop the peanut butter evenly over the batter and swirl it in with a knife.
5. – Top with the remaining cake batter and spread evenly.
6. – Sprinkle the chopped Reese’s peanut butter cups over the top (if using).
7. – Bake for 30-35 minutes, until a toothpick inserted in the center comes out clean.
8. – Allow the cake to cool completely before serving.
Notes
– For an extra peanut butter kick, use crunchy peanut butter instead of creamy.
– Swap out the Reese’s peanut butter cups for mini chocolate chips or chopped nuts.
– Store leftovers in an airtight container at room temperature for up to 5 days.
- Prep Time: 10
- Cook Time: 35
- Category: Dessert
- Method: Baking
- Cuisine: American
Conclusion
Reese’s Peanut Butter Earthquake Cake is truly a dessert worth getting excited about. With its rich, chocolatey base, gooey pockets of peanut butter, and creamy peanut butter frosting, it’s a showstopper that’s sure to impress everyone who tries it. Whether you’re baking it for a special occasion or just because you’re craving something decadent, this recipe is guaranteed to become a new family favorite. So what are you waiting for? Gather your ingredients and get ready to experience the ultimate Reese’s Peanut Butter Earthquake Cake adventure!


