
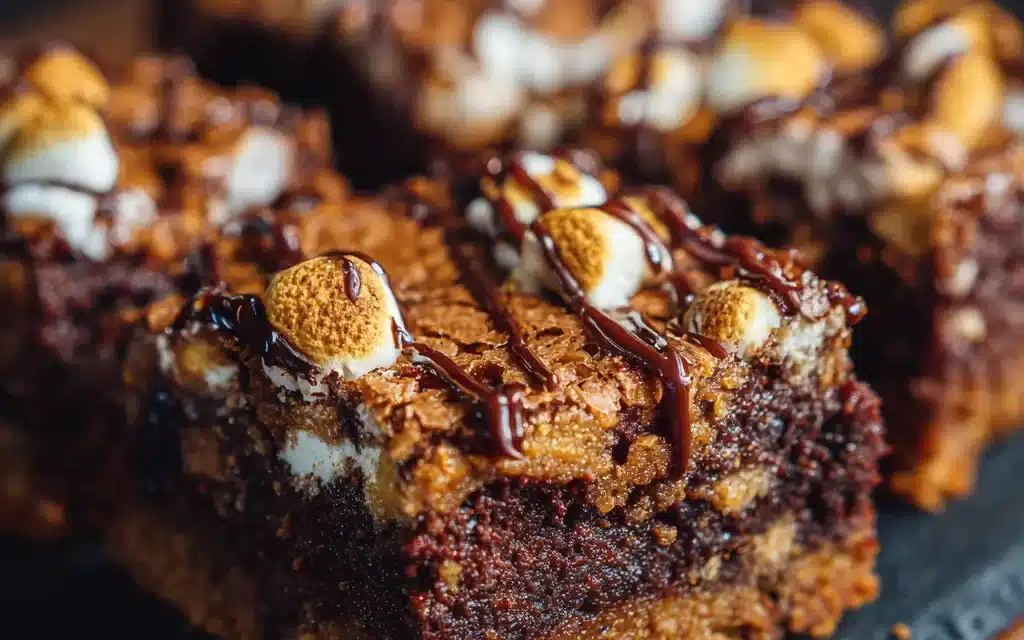
Thanksgiving has always been my favorite holiday. There’s just something so special about gathering with loved ones, indulging in delicious comfort foods, and creating cherished memories that last a lifetime. And for me, no Thanksgiving spread is complete without a tray of homemade Thanksgiving Brownies. It’s a tradition that harkens back to my childhood, when my grandma would spend all day in the kitchen, whipping up her signature fudgy Thanksgiving Brownies. The scent of melted chocolate and warm spices would fill the air, drawing us all into the kitchen, eagerly awaiting our first bite.
Grandma’s Thanksgiving Brownies were the stuff of legends – perfectly moist and decadent, with a rich, fudgy texture that just melted in your mouth. She had this special technique of folding in chopped pecans and a hint of cinnamon that took the flavors to a whole new level. And the best part? She’d always let us kids lick the spoon when she was done mixing the batter. Those are the kinds of little moments that make Thanksgiving so magical, don’t you think?
Why This Thanksgiving Brownies Recipe Will Become Your Go-To
Over the years, I’ve tried countless Thanksgiving Brownies recipes, but none have ever quite captured the same irresistible flavor and texture as my grandma’s. That is, until I finally cracked the code and developed this foolproof Thanksgiving Brownies recipe. It’s the perfect balance of rich chocolatey goodness, warm autumnal spices, and a delightfully fudgy texture that’ll have your guests swooning.
The Secret Behind Perfect Thanksgiving Brownies
The secret lies in a few unexpected ingredients and techniques that elevate these Thanksgiving Brownies to the next level. First, we’re using a combination of both melted chocolate and cocoa powder to create an incredibly deep, complex chocolate flavor. And instead of just plain old granulated sugar, we’re incorporating a touch of brown sugar, which adds a subtle caramel-y note that pairs beautifully with the warm spices.
But perhaps the most game-changing element is the way we’re handling the pecans. Rather than just chopping them up and folding them in, we’re toasting them first to bring out their natural oils and intensify their nutty flavor. Trust me, this extra step makes all the difference in the world.
Essential Ingredients You’ll Need
– High-quality dark chocolate: This is the foundation of your Thanksgiving Brownies, so don’t skimp on the good stuff.
– Unsweetened cocoa powder: For an extra chocolatey punch.
– Butter: Provides rich, decadent texture.
– Granulated and brown sugar: The perfect balance of sweetness.
– Eggs: Helps bind the batter and create that signature fudgy consistency.
– All-purpose flour: The structure-building backbone of your Thanksgiving Brownies.
– Salt: Enhances all the other flavors.
– Ground cinnamon: Adds a warm, autumnal touch.
– Chopped pecans: The crowning glory that takes these Thanksgiving Brownies to new heights.
Step-by-Step Thanksgiving Brownies Instructions
Preparing Your Thanksgiving Brownies
Whipping up a batch of these irresistible Thanksgiving Brownies is surprisingly simple, and the result is well worth the minimal effort. You’ll need just a few basic kitchen tools – a mixing bowl, a whisk, and a square baking pan. The total prep and baking time clocks in at around an hour, so you can easily have these Thanksgiving Brownies ready to serve alongside your other holiday favorites.
1- Preheat your oven to 350°F and grease a 9×9-inch baking pan. This will ensure your Thanksgiving Brownies release cleanly from the pan once baked.
2- In a medium-sized bowl, melt the dark chocolate and butter together over a double boiler or in the microwave, stirring occasionally until smooth and glossy. Allow the chocolate mixture to cool slightly.
3- While the chocolate is cooling, toast the chopped pecans in a dry skillet over medium heat for 3-5 minutes, stirring frequently, until fragrant and lightly browned. This extra step makes all the difference in the world.
4- In a large mixing bowl, whisk together the granulated sugar, brown sugar, eggs, and a pinch of salt until well combined. The mixture should be light and fluffy.
5- Gradually fold the melted chocolate mixture into the sugar-egg mixture, mixing just until incorporated. Then, gently fold in the toasted pecans and a teaspoon of ground cinnamon.
6- Pour the Thanksgiving Brownies batter into your prepared baking pan and use a spatula to spread it out evenly. Bake for 25-30 minutes, until the edges are set but the center is still slightly fudgy.
Pro Tips for Success
The key to perfect Thanksgiving Brownies is all in the technique. First, be sure not to overmix the batter, as this can lead to a tough, gummy texture. Fold the ingredients together gently but thoroughly. And keep a close eye on the baking time – you want the Thanksgiving Brownies to be moist and fudgy, not dry and cakey.
Another pro tip? Let the Thanksgiving Brownies cool completely before cutting into them. This allows the fudgy center to firm up just enough to hold its shape when sliced. And don’t be afraid to get creative with toppings and mix-ins, like a drizzle of caramel sauce or a sprinkle of flaky sea salt.
Serving and Storing Your Thanksgiving Brownies
Perfect Pairings for Thanksgiving Brownies
No Thanksgiving feast is complete without a few delectable desserts to round things out. And these rich, decadent Thanksgiving Brownies pair beautifully with all your holiday favorites. Serve them alongside a scoop of vanilla ice cream or a dollop of freshly whipped cream for an extra indulgent treat. They also make a wonderful accompaniment to a steaming mug of apple cider or a glass of robust red wine.
Storage and Make-Ahead Tips
One of the best things about these Thanksgiving Brownies is that they keep incredibly well. Once the Thanksgiving Brownies have cooled completely, you can store them in an airtight container at room temperature for up to 5 days. For longer storage, pop them in the freezer, where they’ll stay fresh for up to 3 months. When you’re ready to serve, simply thaw at room temperature or give them a quick warm-up in the oven.
And the best part? These Thanksgiving Brownies are actually even better the next day, once the flavors have had a chance to meld and deepen. So feel free to make them a day or two in advance – just be sure to save a few for yourself before the big feast!
Variations and Dietary Adaptations for Thanksgiving Brownies
Creative Thanksgiving Brownies Variations
While the classic pecan-studded version is hard to beat, there are countless ways to put your own spin on these Thanksgiving Brownies. Try swirling in a layer of pumpkin puree or adding a sprinkle of crushed gingersnap cookies for a seasonal twist. You could also substitute the pecans for walnuts, almonds, or even a mix of chopped hazelnuts and dried cranberries.
And if you really want to get fancy, top the Thanksgiving Brownies with a luscious cream cheese frosting or a drizzle of homemade caramel sauce. The possibilities are endless!
Making Thanksgiving Brownies Diet-Friendly
Craving Thanksgiving Brownies but trying to watch your waistline? No problem! There are plenty of ways to lighten up this decadent dessert without sacrificing any of the flavor.
For a gluten-free version, simply swap out the all-purpose flour for a 1-to-1 gluten-free flour blend. And to make these Thanksgiving Brownies vegan, use dairy-free chocolate, plant-based butter, and flax or chia eggs in place of the regular eggs.
You can also reduce the sugar content by using a combination of granulated sweetener and unsweetened applesauce or mashed banana. And if you’re following a low-carb diet, try swapping the all-purpose flour for almond flour or coconut flour.
No matter how you choose to customize these Thanksgiving Brownies, the end result is sure to be just as rich, fudgy, and irresistible as the original.
Frequently Asked Questions
Q: Can I use milk chocolate instead of dark chocolate in this Thanksgiving Brownies recipe?
A: While you certainly can use milk chocolate, I would highly recommend sticking with dark chocolate. The deeper, more intense chocolate flavor of the dark chocolate is what really makes these Thanksgiving Brownies so special. Milk chocolate will result in a sweeter, less complex final product.
Q: How do I know when the Thanksgiving Brownies are done baking?
A: The key signs to look for are a set edge with a still slightly fudgy center. You want to bake the Thanksgiving Brownies until a toothpick inserted in the center comes out with just a few moist crumbs clinging to it. The center should still look a bit underbaked, as it will continue to firm up as the Thanksgiving Brownies cool.
Q: Can I make the Thanksgiving Brownies ahead of time?
A: Absolutely! In fact, these Thanksgiving Brownies actually get better with a little time. You can bake them up to 5 days in advance and store them in an airtight container at room temperature. They also freeze beautifully for up to 3 months. Just be sure to let them thaw completely before serving.
Q: How many Thanksgiving Brownies does this recipe make?
A: This recipe will yield 16 generous servings of Thanksgiving Brownies when cut into a 4×4 grid in the 9×9-inch baking pan. Of course, you can always cut them into smaller pieces if you’d like to feed a larger crowd.
Q: Help! My Thanksgiving Brownies turned out dry and crumbly. What went wrong?
A: Overbaking is the most common culprit for dry, crumbly Thanksgiving Brownies. Be sure to keep a close eye on them in the oven and pull them out as soon as the edges are set but the center is still a bit fudgy. You can also try reducing the baking temperature by 25°F to prevent the edges from overbaking before the center is done.
Conclusion
There’s just something so comforting and nostalgic about a pan of freshly baked Thanksgiving Brownies. The rich chocolate aroma, the warm spices, and the toasted pecans – it all comes together to create a dessert that’s truly worthy of a spot on your holiday table.
I hope this recipe helps you recreate those same special memories that I have with my grandma’s famous Thanksgiving Brownies. Give it a try this year, and I guarantee it’ll become a new family favorite. Let me know how they turn out in the comments below, and don’t forget to share your photos! Happy Thanksgiving, everyone.


