

It was a rainy Saturday afternoon, and my kids were bouncing off the walls. I needed something quick and fun to keep them entertained while I prepped dinner. That’s when I remembered my childhood favorite: the classic Lunchable. But instead of going for the store-bought version, I decided to get a little creative and make a Make-Your-Own Lunchable at home.
I gathered all the essentials from the fridge and pantry. As I laid out the colorful ingredients on the kitchen counter, my kids’ eyes lit up. “Can we build our own?” they exclaimed, and I couldn’t help but smile. There’s something magical about a DIY lunch that brings out the inner chef in everyone, no matter their age!
As they started stacking cheddar cheese on turkey slices and arranging grapes, I realized this simple act was more than just a meal; it was a way to bond. We laughed, shared stories, and they even began to experiment by adding olives and cucumbers to their creations. By the time we were done, we had a vibrant spread of Make-Your-Own Lunchables ready to devour.
Not only did it keep them busy, but it also gave them the freedom to choose their favorite ingredients, making lunchtime a delightful adventure. The best part? It took just 15 minutes to prepare, and there was no cooking involved! This experience taught me that a Make-Your-Own Lunchable isn’t just a meal; it’s an opportunity to create memories.
Now, every time the rain clouds roll in, I know exactly how to turn that energy into something delicious and fun. So, let’s dive into how you can create your very own Make-Your-Own Lunchable that will surely become a hit at your lunch table!
Why This Make-Your-Own Lunchable Recipe Will Become Your Go-To
The Secret Behind Perfect Make-Your-Own Lunchable
What makes this Make-Your-Own Lunchable special? It’s the perfect blend of convenience, creativity, and nutrition. You can whip it up in just 15 minutes without any cooking, making it an ideal choice for busy weekdays or lazy weekends. The beauty lies in its versatility; you can customize it to suit anyone’s taste.
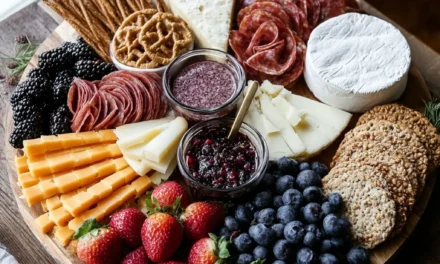
Imagine the crunch of whole grain crackers paired with creamy hummus or ranch dressing, all while enjoying the sweetness of fresh grapes and berries. Each bite is a delightful combination of textures and flavors. Plus, it’s a healthy alternative to many processed lunch options, keeping the kids (and adults) happy and energized.
This Make-Your-Own Lunchable is not just a meal; it’s an invitation to explore different flavor combinations and textures. Whether you’re packing it for a picnic, a school lunch, or just serving it as a fun afternoon snack, this recipe will become your go-to.
Essential Ingredients You’ll Need
To create the perfect Make-Your-Own Lunchable, you’ll need a few key ingredients that balance flavor, texture, and nutrition. Here’s what you’ll need:
4 slices of cheddar cheese
Cheddar cheese not only adds a rich, creamy flavor but also provides calcium and protein, making it a nutritious choice.
4 slices of turkey or ham
Turkey or ham are excellent sources of lean protein. They add savory goodness and pair wonderfully with cheese and crackers.
1 cup of assorted grapes and berries
These fresh fruits offer a burst of sweetness and antioxidants, making your lunch not just tasty but also healthy.
1 cup of whole grain crackers
Whole grain crackers provide a satisfying crunch and are a great source of fiber, making them the perfect vehicle for your cheese and spreads.
1/4 cup of hummus or ranch dressing
Hummus is a creamy, nutritious dip made from chickpeas, while ranch dressing adds a tangy flavor. Both enhance the overall experience of your Make-Your-Own Lunchable.
Optional: olives, sliced cucumbers, or cherry tomatoes
These optional ingredients can elevate your lunch by adding more colors, flavors, and textures, allowing for endless customization.
Step-by-Step Make-Your-Own Lunchable Instructions
Preparing Your Make-Your-Own Lunchable
Making your Make-Your-Own Lunchable is a breeze! With a prep time of just 15 minutes and zero cook time, you’ll have a delicious meal ready in no time. Gather your ingredients and some fun plates or trays to serve everything on.
1- Start by laying out all your ingredients on a clean workspace. This not only makes it easier to assemble but also allows everyone to see their options. It’s like setting the stage for a culinary creation!
2- Take a slice of cheddar cheese and fold it in half. Place it on your plate as the base for your first stack. The cheese’s creamy texture will complement the other ingredients beautifully.
3- Next, grab a slice of turkey or ham and layer it on top of the cheese. Don’t be afraid to get creative! You can even fold it or cut it into fun shapes for a visual twist.
4- Now, it’s time to add some color! Grab a handful of assorted grapes or berries and scatter them around your cheese and meat stack. The vibrant colors will make your Make-Your-Own Lunchable visually appealing and appetizing.
5- Take a few whole grain crackers and arrange them on the side. Their crunchy texture provides a delightful contrast to the creamy cheese and savory meat.
6- Finally, add a small bowl of hummus or ranch dressing for dipping. This not only enhances the flavors but also adds an interactive element to your meal. Serve everything together and watch the smiles appear!
Pro Tips for Success
- Prep Ahead: If you’re short on time during the week, prep the ingredients ahead of time. Slice the cheese, turkey, and veggies, and store them in airtight containers for easy assembly.
- Mix and Match: Don’t hesitate to swap out ingredients based on what you have on hand. Different cheeses, meats, or fruits can completely change the experience!
- Keep It Fresh: Use fresh ingredients for the best flavor. If you can, buy local produce or visit a farmer’s market for your fruits and veggies.
- Make It Fun: Encourage your kids to get creative with their Make-Your-Own Lunchables. Offer a variety of toppings and let them build their favorites.
- Watch the Portions: Since this recipe serves four, be mindful of how much of each ingredient you’re using to ensure everyone gets a fair share!
Serving and Storing Your Make-Your-Own Lunchable
Perfect Pairings for Make-Your-Own Lunchable
With this Make-Your-Own Lunchable serving 4, it’s perfect for a family lunch or a fun gathering with friends. Pair it with a refreshing fruit salad for a burst of sweetness, or add some crunchy veggie sticks for extra crunch.
For beverages, consider serving it with a light lemonade or sparkling water to keep things refreshing. If it’s a warm day, a chilled iced tea would make a delightful accompaniment. This meal is versatile enough for picnics, lunchboxes, or even a relaxed dinner at home.
Storage and Make-Ahead Tips
If you find yourself with leftovers or want to prepare ahead of time, storing your Make-Your-Own Lunchable is easy. Keep the ingredients separate to maintain freshness. Store the cheese, turkey, and crackers in airtight containers in the refrigerator for up to 3 days.
For the fruits, wash and slice them just before serving to keep them looking and tasting their best. If you want to meal prep, you can pre-portion everything into individual containers, making lunchtime a breeze.
Avoid freezing the assembled Lunchables, as the texture of the cheese and crackers can change once thawed. Instead, focus on prepping the individual ingredients ahead of time for a quick assembly.
Variations and Dietary Adaptations for Make-Your-Own Lunchable
Creative Make-Your-Own Lunchable Variations
Get adventurous with your Make-Your-Own Lunchable by trying out these fun variations:
- Mediterranean Twist: Swap cheddar cheese for feta, use hummus as your dip, and add olives and cherry tomatoes for a refreshing Mediterranean flair.
- Tex-Mex Style: Use pepper jack cheese, turkey or chicken, and add some salsa as your dip. Include tortilla chips instead of crackers for a delightful crunch.
- Sweet Treat Version: Turn your lunchable into a dessert by adding slices of strawberries, a small serving of nut butter, and graham crackers.
- Veggie Delight: Incorporate sliced bell peppers, cucumbers, and carrots, alongside a creamy ranch dip to create a veggie-packed lunch that’s both healthy and satisfying.
Making Make-Your-Own Lunchable Diet-Friendly
No matter your dietary restrictions, you can customize your Make-Your-Own Lunchable to fit your needs:
- Gluten-Free: Use gluten-free crackers or veggies like cucumber slices or bell pepper halves as the base.
- Vegan: Substitute the cheddar cheese with vegan cheese slices, use hummus, and replace turkey or ham with plant-based deli slices.
- Low-Carb: Skip the crackers and focus on veggies like sliced cucumbers, cherry tomatoes, and bell peppers as your main ingredients.
- Dairy-Free: Opt for non-dairy cheese options and pair with hummus or guacamole for a delicious and creamy dip.
Frequently Asked Questions
Q: Can I substitute the turkey or ham with something else?
A: Absolutely! You can use any deli meat you prefer or even plant-based alternatives for a vegetarian option.
Q: How long will it take to prepare this recipe?
A: This Make-Your-Own Lunchable takes just 15 minutes to prepare, and there’s no cook time involved, making it a quick and easy meal option.
Q: How should I store leftovers?
A: Store leftover ingredients in airtight containers in the fridge for up to 3 days. Keep fruits separate to maintain their freshness.
Q: How many servings does this recipe make?
A: This recipe serves 4, making it a perfect option for family lunches or small gatherings.
Q: What should I do if I have leftover ingredients?
A: You can easily mix and match remaining ingredients for another lunch, or simply pack them as snacks for the next day!
Conclusion
Now that you know how to whip up your very own Make-Your-Own Lunchable, it’s time to get creative! This recipe is not just about feeding the family; it’s about creating memories together and enjoying the process of building your own lunch. I encourage you to try this recipe and experiment with your favorite ingredients. Feel free to share your creations in the comments below or tag us on social media! Happy lunching!


