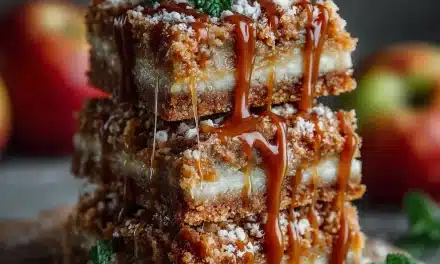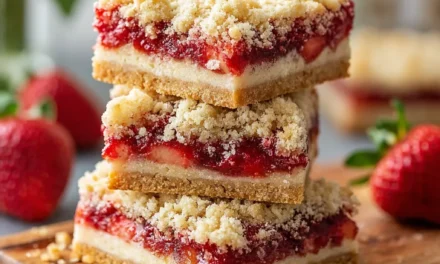
As I stood in my kitchen, the sweet aroma of melting butter filled the air, and memories of my grandmother flooded my mind. She had a knack for making desserts that brought everyone together, and one of her favorites was her famous Pistachio Cheesecake Bars. I remember sitting at her kitchen table, the sun streaming through the window, as we’d dig into those creamy squares topped with crunchy pistachios, the vibrant green contrasting beautifully with the rich, velvety cheesecake. It felt like a celebration every time we made them, and the laughter and joy were just as sweet as the dessert itself.
Fast forward to today, and I’ve carried that love for Pistachio Cheesecake Bars into my own kitchen. Each time I whip up a batch, it feels like a warm hug, and I can’t help but share this delightful recipe with friends and family. The beauty of these bars lies in their simplicity and the fact that they’re perfect for any occasion, whether it’s a summer picnic or a cozy winter gathering. The blend of silky cream cheese and the nutty flavor of pistachios is nothing short of heavenly. Plus, they’re incredibly easy to make! Just a few ingredients and about 45 minutes of your time can yield a dessert that wows everyone. Trust me, once you try this recipe, you’ll be hooked, and it might just become your go-to for gatherings, just like it is for me.
Why This Pistachio Cheesecake Bars Recipe Will Become Your Go-To
The Secret Behind Perfect Pistachio Cheesecake Bars
What sets this Pistachio Cheesecake Bars recipe apart is its perfect balance of flavors and textures. The buttery, crumbly crust complements the creamy filling, while the crushed pistachios add a delightful crunch. Unlike traditional cheesecakes that can be daunting to make, these bars simplify the process without compromising on taste or presentation. The addition of heavy cream gives the filling an irresistible smoothness, making every bite melt in your mouth. Plus, they’re easy to store and serve, making them ideal for entertaining.
Imagine being able to whip up a crowd-pleasing dessert in just 45 minutes! This recipe is straightforward enough for beginners yet impressive enough for seasoned bakers. With just the right sweetness from the powdered sugar and a hint of vanilla, you’ll find yourself reaching for seconds— and maybe even thirds. The vibrant green topping isn’t just for show; it adds a nutty depth that perfectly balances the rich cheesecake, making these bars an unforgettable treat.
Essential Ingredients You’ll Need
1 ½ cups graham cracker crumbs
The foundation of your cheesecake bars, graham cracker crumbs provide a sweet, crunchy base that contrasts beautifully with the creamy filling. They absorb some moisture during baking, creating that perfect crust.
½ cup unsalted butter, melted
Butter is essential for binding the graham cracker crumbs together, creating a rich and flavorful crust. Using unsalted butter allows you to control the saltiness of the dessert.
2 cups cream cheese, softened
Cream cheese is the star of the show, giving the bars their signature creaminess. Soften it beforehand to ensure a smooth and lump-free filling, making it easy to blend with the other ingredients.
1 cup powdered sugar
Powdered sugar sweetens the filling while blending seamlessly into the cream cheese, ensuring a smooth texture. Its fine consistency helps prevent any grittiness that can occur with granulated sugar.
1 tablespoon vanilla extract
Vanilla extract enhances the flavor profile of the cheesecake, adding warmth and depth. It’s a simple ingredient that makes a world of difference in elevating the overall taste.
1 cup heavy cream
Heavy cream contributes to a rich, luscious filling. When whipped, it adds volume and lightness to the cheesecake, creating that perfect melt-in-your-mouth texture.
1 cup crushed pistachios (plus extra for topping)
The crushed pistachios not only provide that signature nutty flavor but also add a beautiful visual element. They give a delightful crunch that complements the smooth cheesecake and can be sprinkled on top for an attractive finish.
Step-by-Step Pistachio Cheesecake Bars Instructions
Preparing Your Pistachio Cheesecake Bars
This delightful dessert requires just 15 minutes of prep time and 30 minutes of bake time, totaling 45 minutes before you can dig in. You’ll need a mixing bowl, a 9×9-inch baking dish, and an electric mixer for the smoothest results. Let’s dive in!
1- Begin by preheating your oven to 325°F (160°C). This temperature ensures the cheesecake bakes evenly without cracking. While the oven heats, grease your baking dish lightly to prevent sticking and allow for easy removal later.
2- In a mixing bowl, combine the graham cracker crumbs and melted butter. Use a fork to mix until the crumbs are evenly coated and resemble wet sand. Press this mixture firmly into the bottom of the prepared baking dish, ensuring it’s compact and even. This step is crucial for a sturdy crust.
3- In a separate large bowl, beat the softened cream cheese with an electric mixer until it’s creamy and smooth. This should take about 2-3 minutes. Gradually add the powdered sugar and continue mixing until fully incorporated, ensuring there are no lumps left behind.
4- Add the vanilla extract and heavy cream to the cream cheese mixture. Beat on medium speed until the mixture is fluffy and light, which should take another 2-3 minutes. You’ll notice the filling becoming airy, and it should have a glossy finish.
5- Gently fold in the crushed pistachios using a spatula, ensuring they’re evenly distributed throughout the filling. This adds that delightful nutty flavor and crunch. Pour the mixture over the prepared graham cracker crust, smoothing the top with the spatula.
6- Bake the bars in the preheated oven for about 30 minutes. You’ll know they’re ready when the edges are set but the center still has a slight jiggle. Remove from the oven and let cool to room temperature before refrigerating for at least 2 hours. Once chilled, slice into squares and garnish with extra crushed pistachios for a beautiful presentation.
Pro Tips for Success
To ensure your Pistachio Cheesecake Bars turn out perfectly every time, here are some expert tips:
- Room Temperature Ingredients: Make sure your cream cheese is softened to room temperature for a smoother filling. Cold cream cheese can lead to lumps.
- Don’t Overmix: When incorporating the heavy cream, mix just until combined to maintain that light and airy texture.
- Chill Thoroughly: Allow the bars to chill completely before cutting. This sets the filling and makes for cleaner slices.
- Use Quality Pistachios: Opt for shelled pistachios that are unsalted for the best flavor. Toasting them lightly can enhance their nuttiness.
- Experiment with Flavors: Feel free to add a touch of almond extract or lemon zest to the filling for an extra flavor twist!
Serving and Storing Your Pistachio Cheesecake Bars
Perfect Pairings for Pistachio Cheesecake Bars
These Pistachio Cheesecake Bars serve 12 generous portions, making them perfect for gatherings. Pair them with a dollop of whipped cream or a scoop of vanilla ice cream for an indulgent dessert. A light herbal tea or a refreshing mint lemonade complements the rich flavors beautifully. For special occasions, serve them alongside a fruit platter or a selection of gourmet cheeses to create an impressive dessert table.
Storage and Make-Ahead Tips
To keep your Pistachio Cheesecake Bars fresh, store them in an airtight container in the refrigerator for up to a week. You can also freeze them for longer storage; simply wrap each bar in plastic wrap and then place them in a freezer-safe container. They’ll keep well for up to 3 months. When you’re ready to enjoy, let them thaw in the refrigerator overnight. For a quick reheat, pop them in the microwave for about 15-20 seconds.
Variations and Dietary Adaptations for Pistachio Cheesecake Bars
Creative Pistachio Cheesecake Bars Variations
If you want to switch things up, here are a few creative variations to try:
- Chocolate Swirl: Add a chocolate ganache swirl on top before baking for a decadent twist. Simply melt chocolate and drizzle it over the filling, using a skewer to create swirls.
- Fruit Topping: Top your bars with a layer of fresh berries or a fruit compote for a burst of freshness that contrasts with the rich cheesecake.
- Nutty Medley: Mix in other nuts like walnuts or almonds along with the pistachios for a delightful nutty crunch.
- Seasonal Flavors: Experiment with seasonal flavors like pumpkin spice in the fall or peppermint extract during the holidays to keep things interesting.
Making Pistachio Cheesecake Bars Diet-Friendly
If you or your guests have dietary restrictions, here are some alternatives:
- Gluten-Free: Substitute the graham cracker crumbs with gluten-free crumbs or crushed nuts for the base.
- Vegan: Use vegan cream cheese and coconut cream in place of heavy cream, along with a plant-based butter substitute for the crust.
- Low-Carb: For a low-carb option, swap the graham cracker crumbs for almond flour and use a sugar substitute like erythritol in the filling.
- Dairy-Free: Opt for dairy-free cream cheese made from nuts and use coconut milk for a rich filling.
Frequently Asked Questions
Q: Can I substitute cream cheese for another type of cheese?
A: Yes, you can use mascarpone for a different flavor and texture. However, the result may vary slightly in richness and creaminess.
Q: How can I ensure my cheesecake bars set properly within the 45-minute total time?
A: Keeping a close eye on the baking time is key. The edges should be firm while the center remains slightly jiggly. Chilling thoroughly afterward is essential for the final texture.
Q: What’s the best way to store leftovers?
A: Store your Pistachio Cheesecake Bars in an airtight container in the refrigerator for up to a week, or freeze them for up to 3 months.
Q: Can I scale this recipe up or down?
A: Yes! This recipe can be easily halved or doubled. Just adjust the baking dish size accordingly to maintain the same thickness.
Q: What should I do if my bars crack while baking?
A: Cracks can occur if the mixture is overbaked. Keep an eye on them and remove them from the oven as soon as the edges are set. A quick chill can help minimize visible cracks.
Conclusion
I hope you’re as excited as I am to try these Pistachio Cheesecake Bars! They’re not just a dessert; they’re a celebration of flavors and memories. I encourage you to gather your ingredients and get baking. Once you’ve tasted the creamy, nutty goodness of these bars, you’ll understand why they’ve become a beloved recipe in my home. Don’t forget to share your experiences in the comments below, and let’s spread the love for these delightful treats! Happy baking!